
This post is a little outdated, for my current setup see here and for more preaching about lightweight touring see here.
Sometimes I wonder if my passion for gear and bike geekery outweighs that of actually riding. Ever since going pannier free in Colombia, an act comparable to pissing on the bible in cycle touring circles, my daily musings have often revolved around how to modify the set-up further.
With the focus of the trip having now gravitated towards exploring remote dirt road and single-track routes through the Andes, the primary aim is to achieve as light and well distributed a set-up as possible. The current arrangement works well on the whole, but with the bulk of weight dumped high on the rear end, off-road handling isn’t exactly something to write home about. So, given that some friends were coming out to visit I took the opportunity to load them up with a variety of new bags for the bike, in addition, of course, to the usual offerings of contact lenses and a tyre (thanks John and Hannah). Drawing inspiration from the emerging ‘bikepacking’ scene my latest scheme involves severing the last connection with a traditional set-up by jettisoning the rear rack and basically sticking stuff all over the bike. The degree of faffing and number of iterations has been significant, but the prevailing incarnation is shown below:
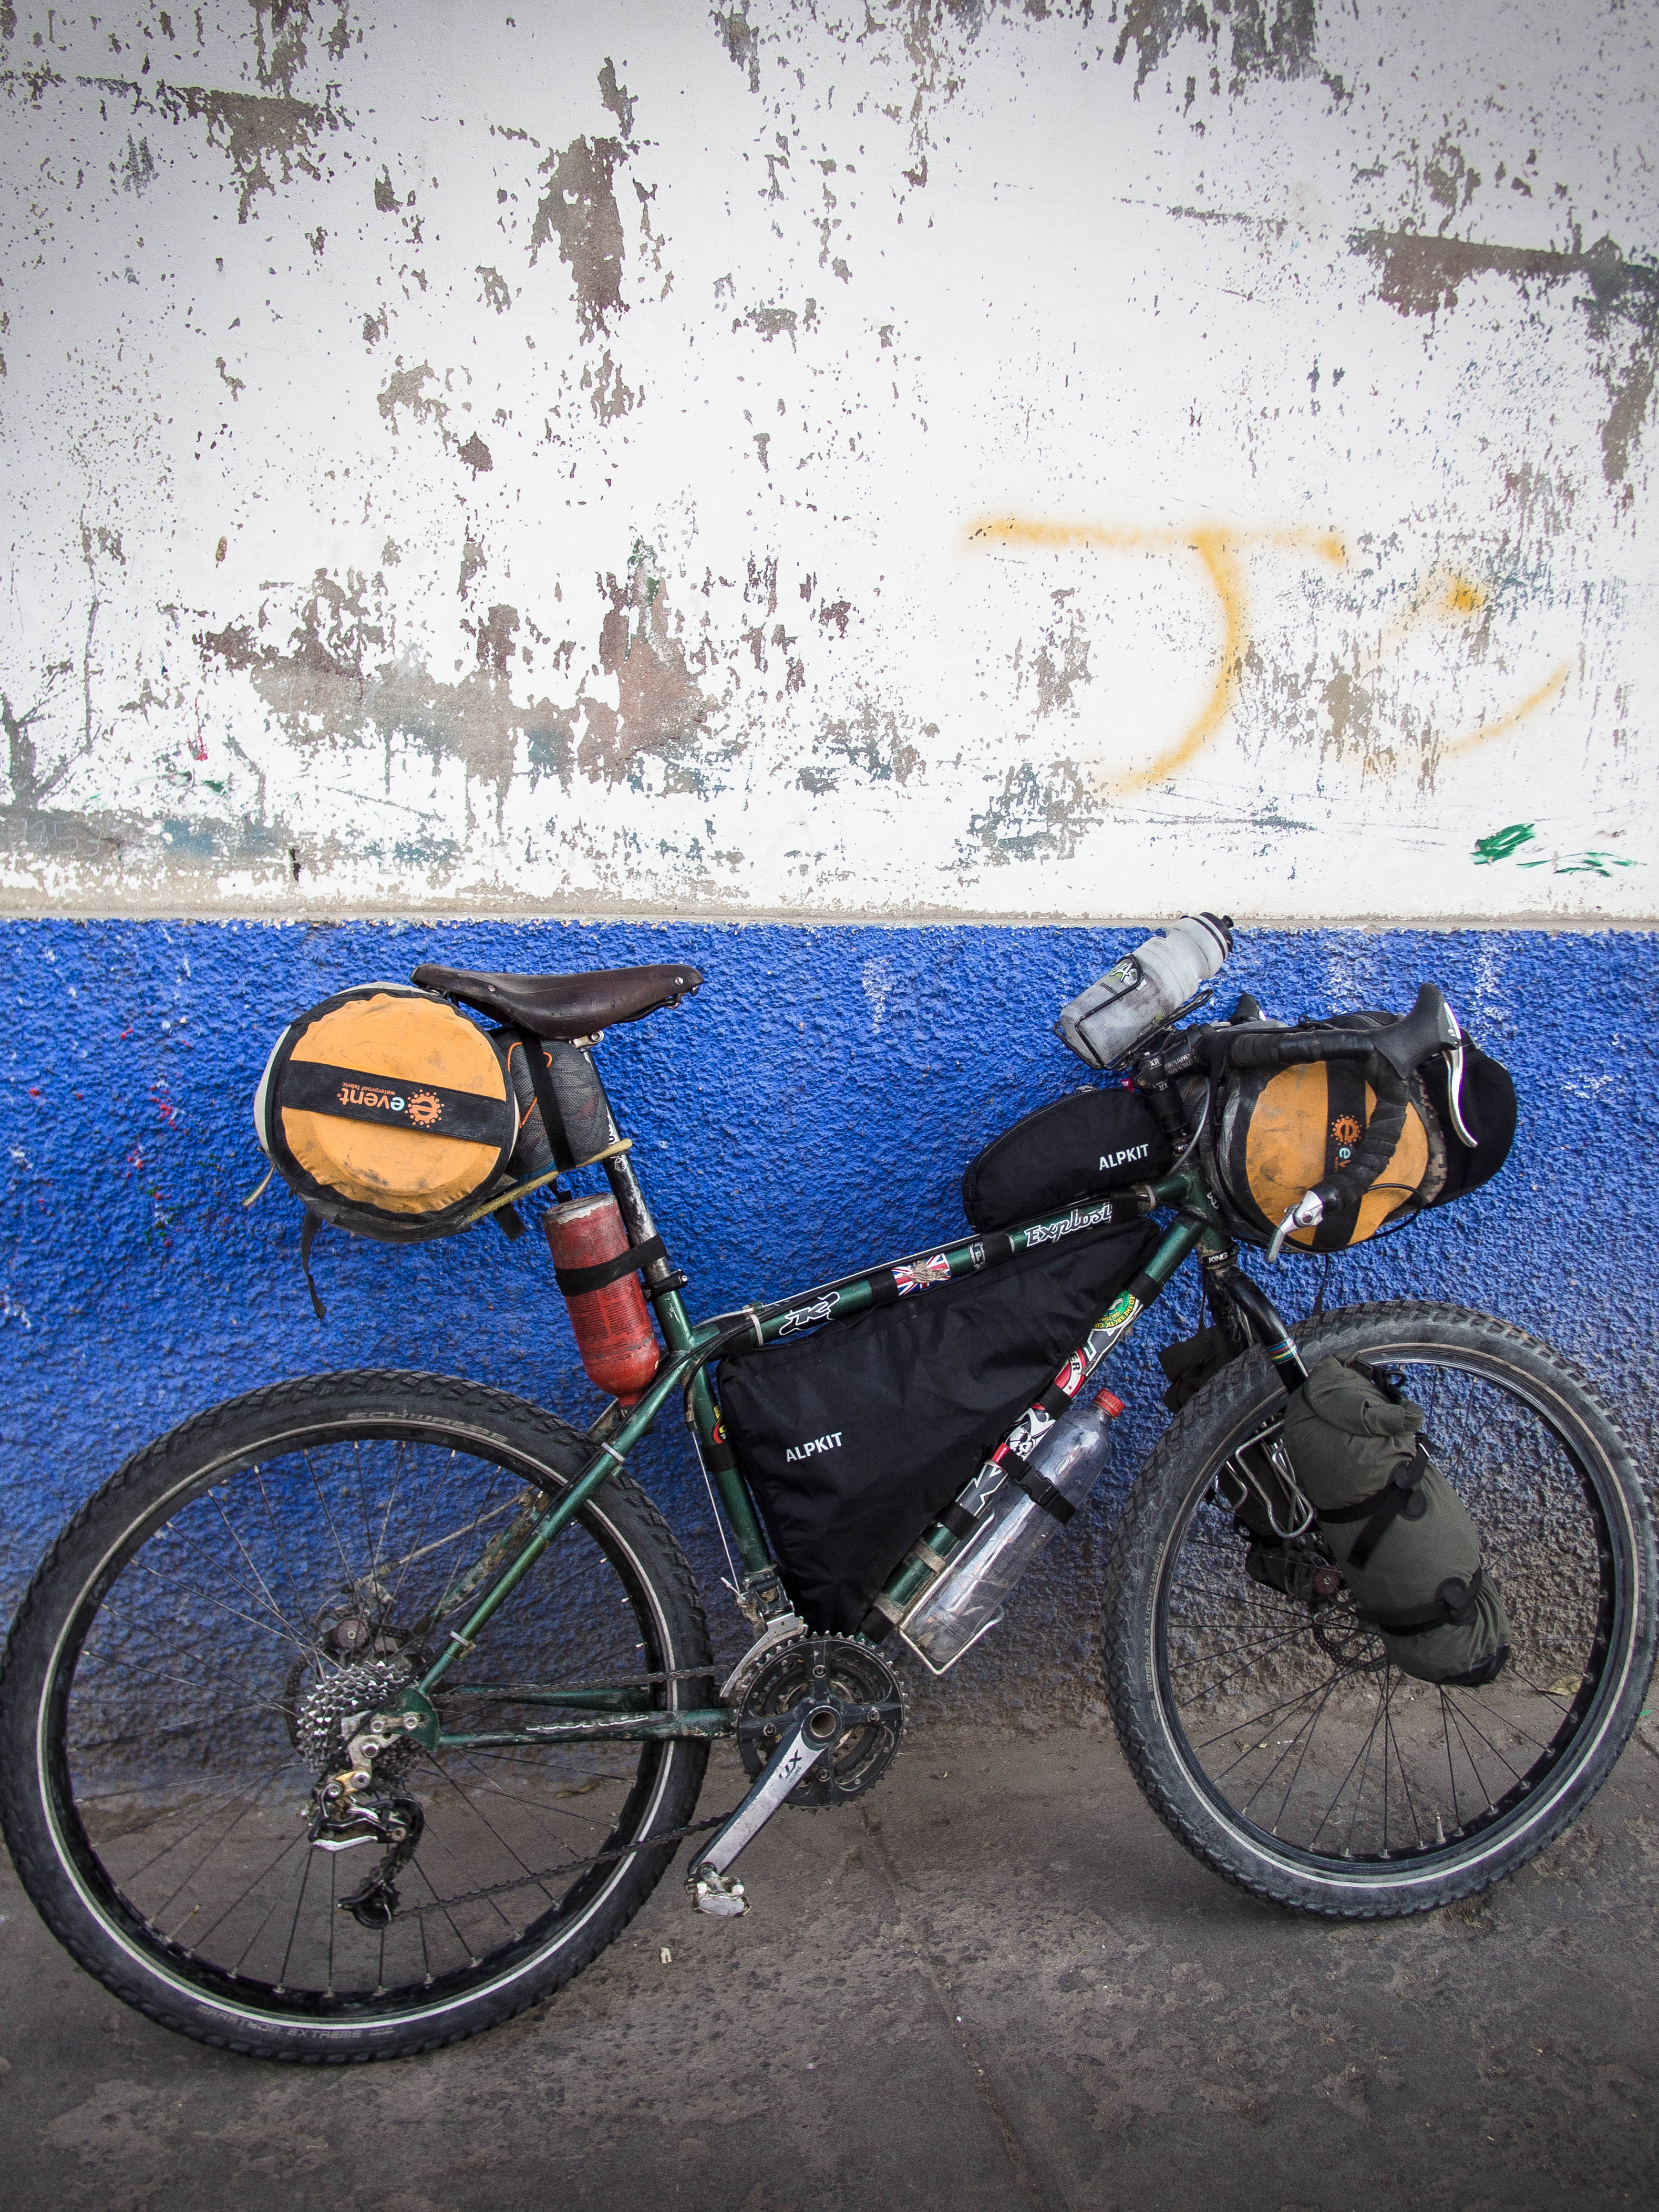
Ready to hit up some Andean off-road routes
Space for food on remote multi-day jaunts is admittedly fairly limited, but there’s also a double-ended Alpkit dry bag waiting in the wings to strap onto the rear if needs be. I’m also packing a lightweight foldup rucksack, which I may end up using instead.
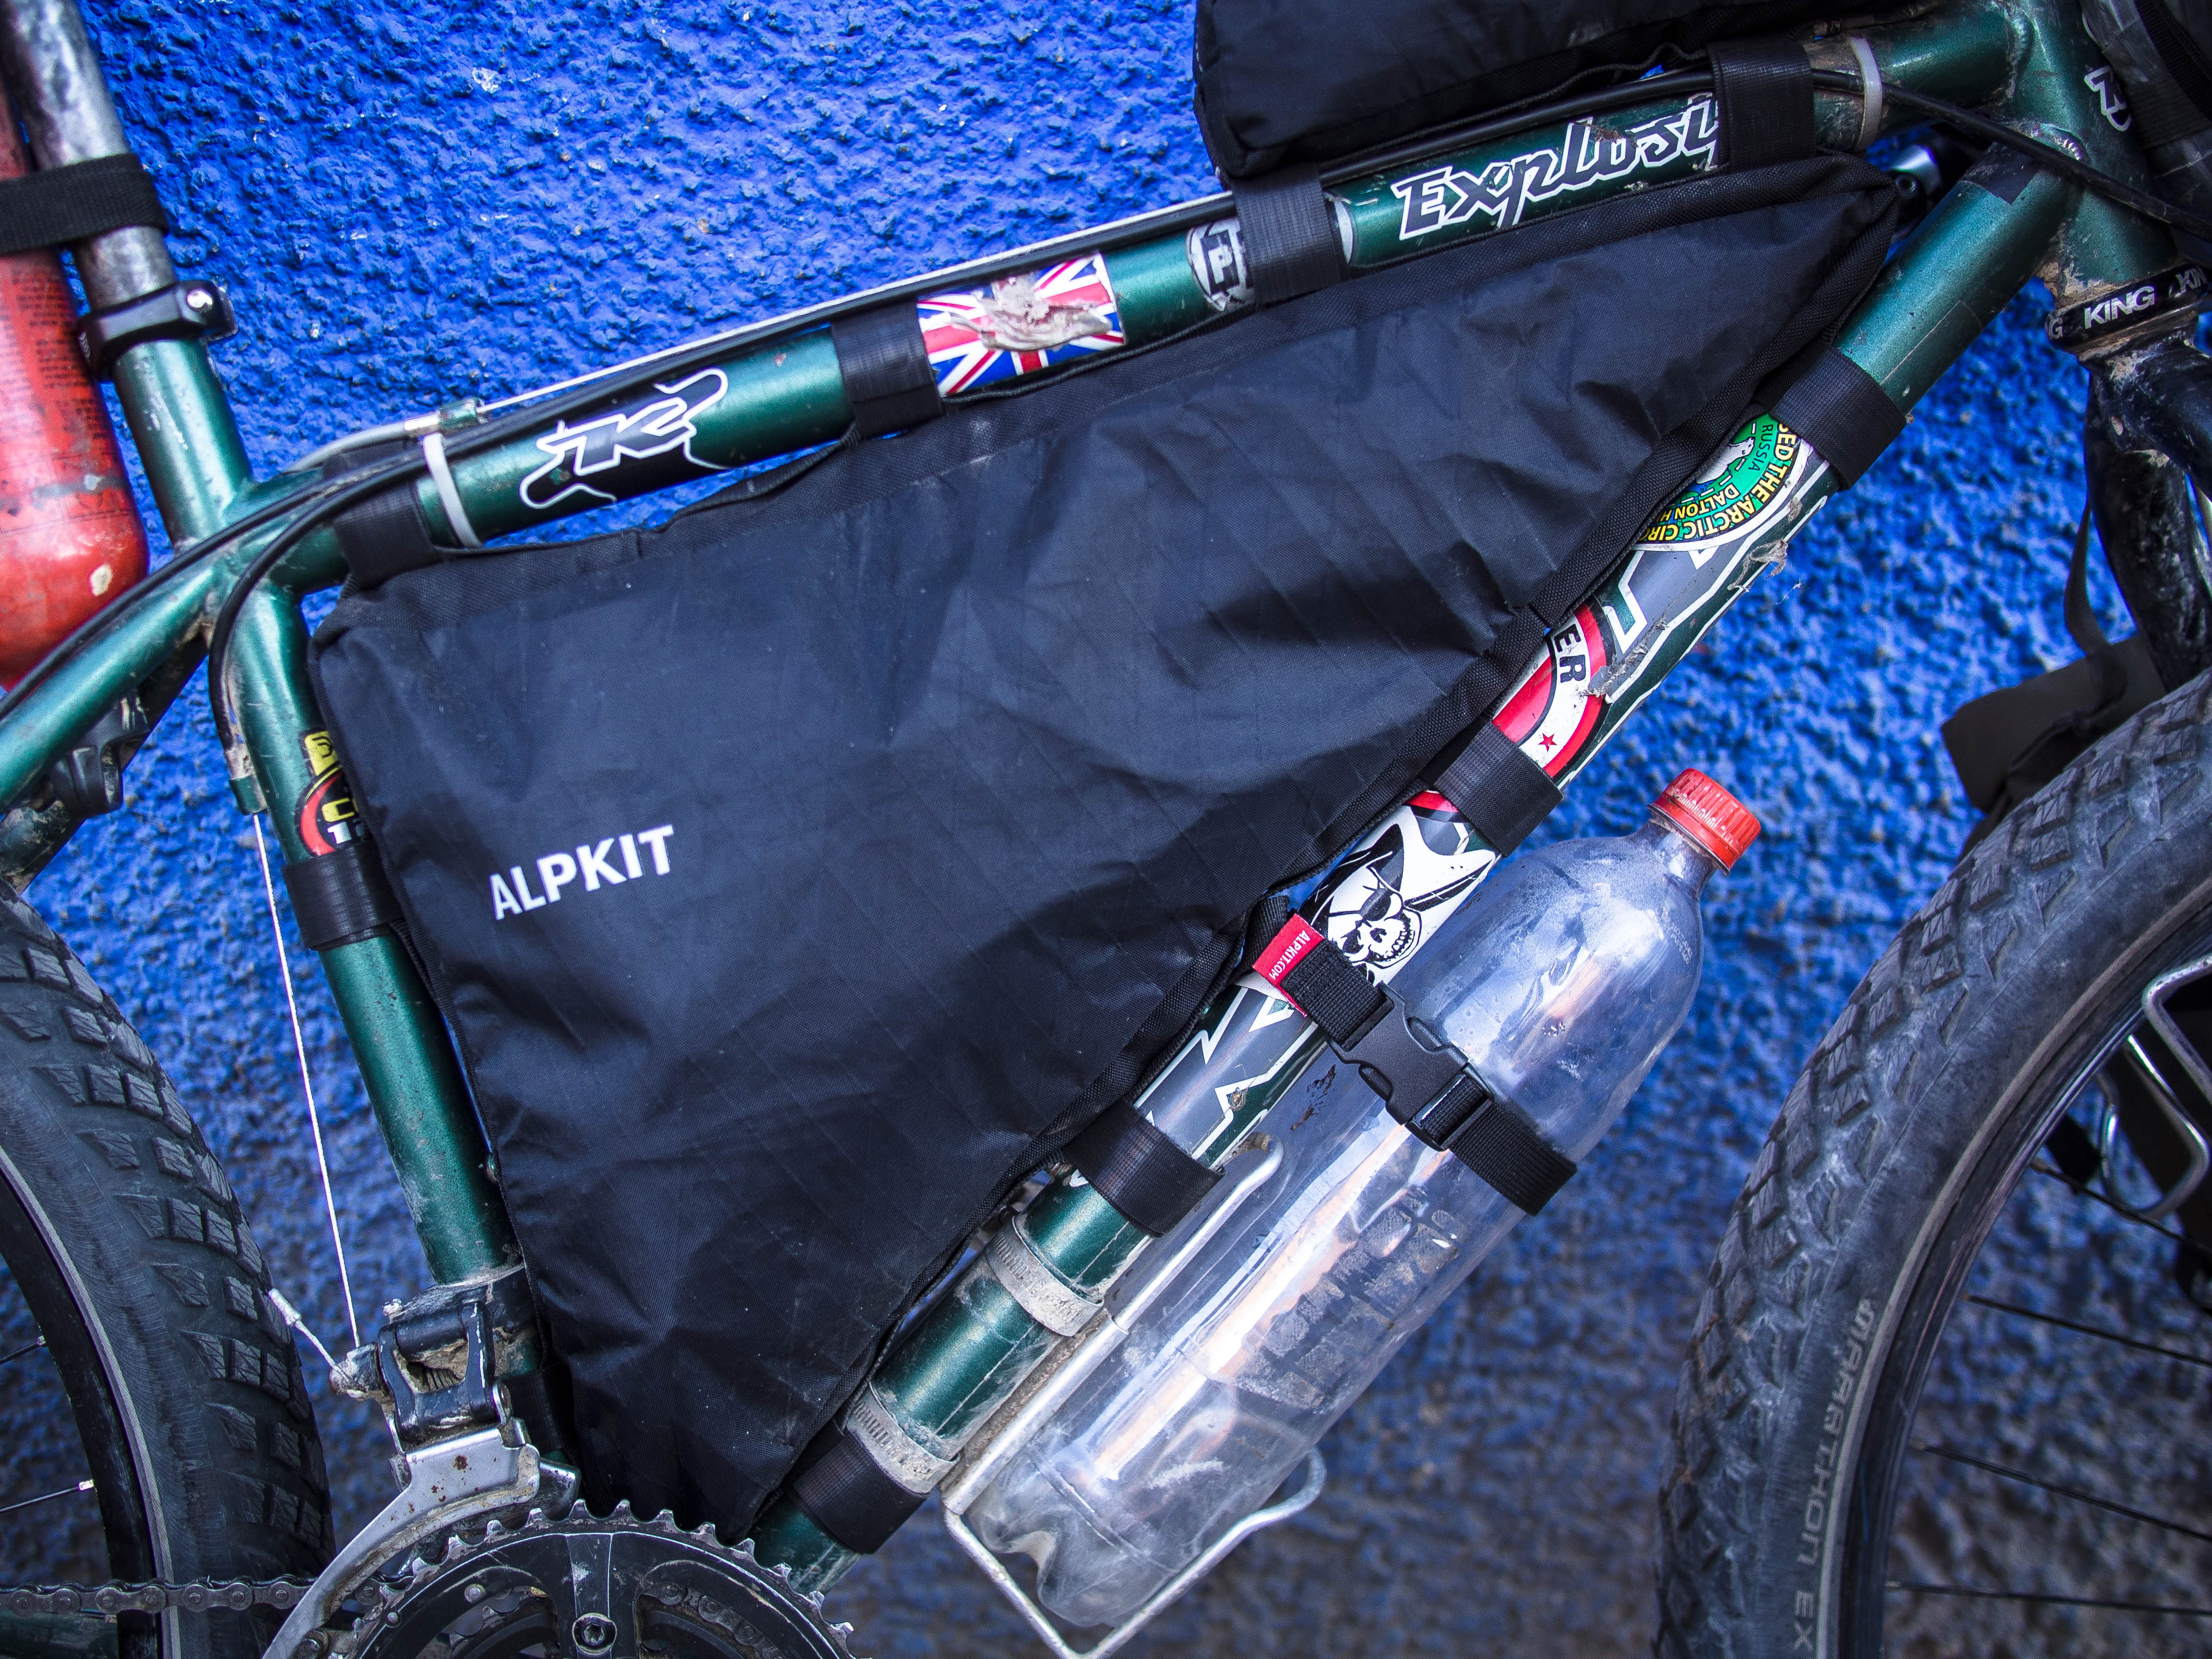
Although not quite the tardis I was hoping for the framebag is a very useful addition for stashing heavy items and keeping the weight low/central.
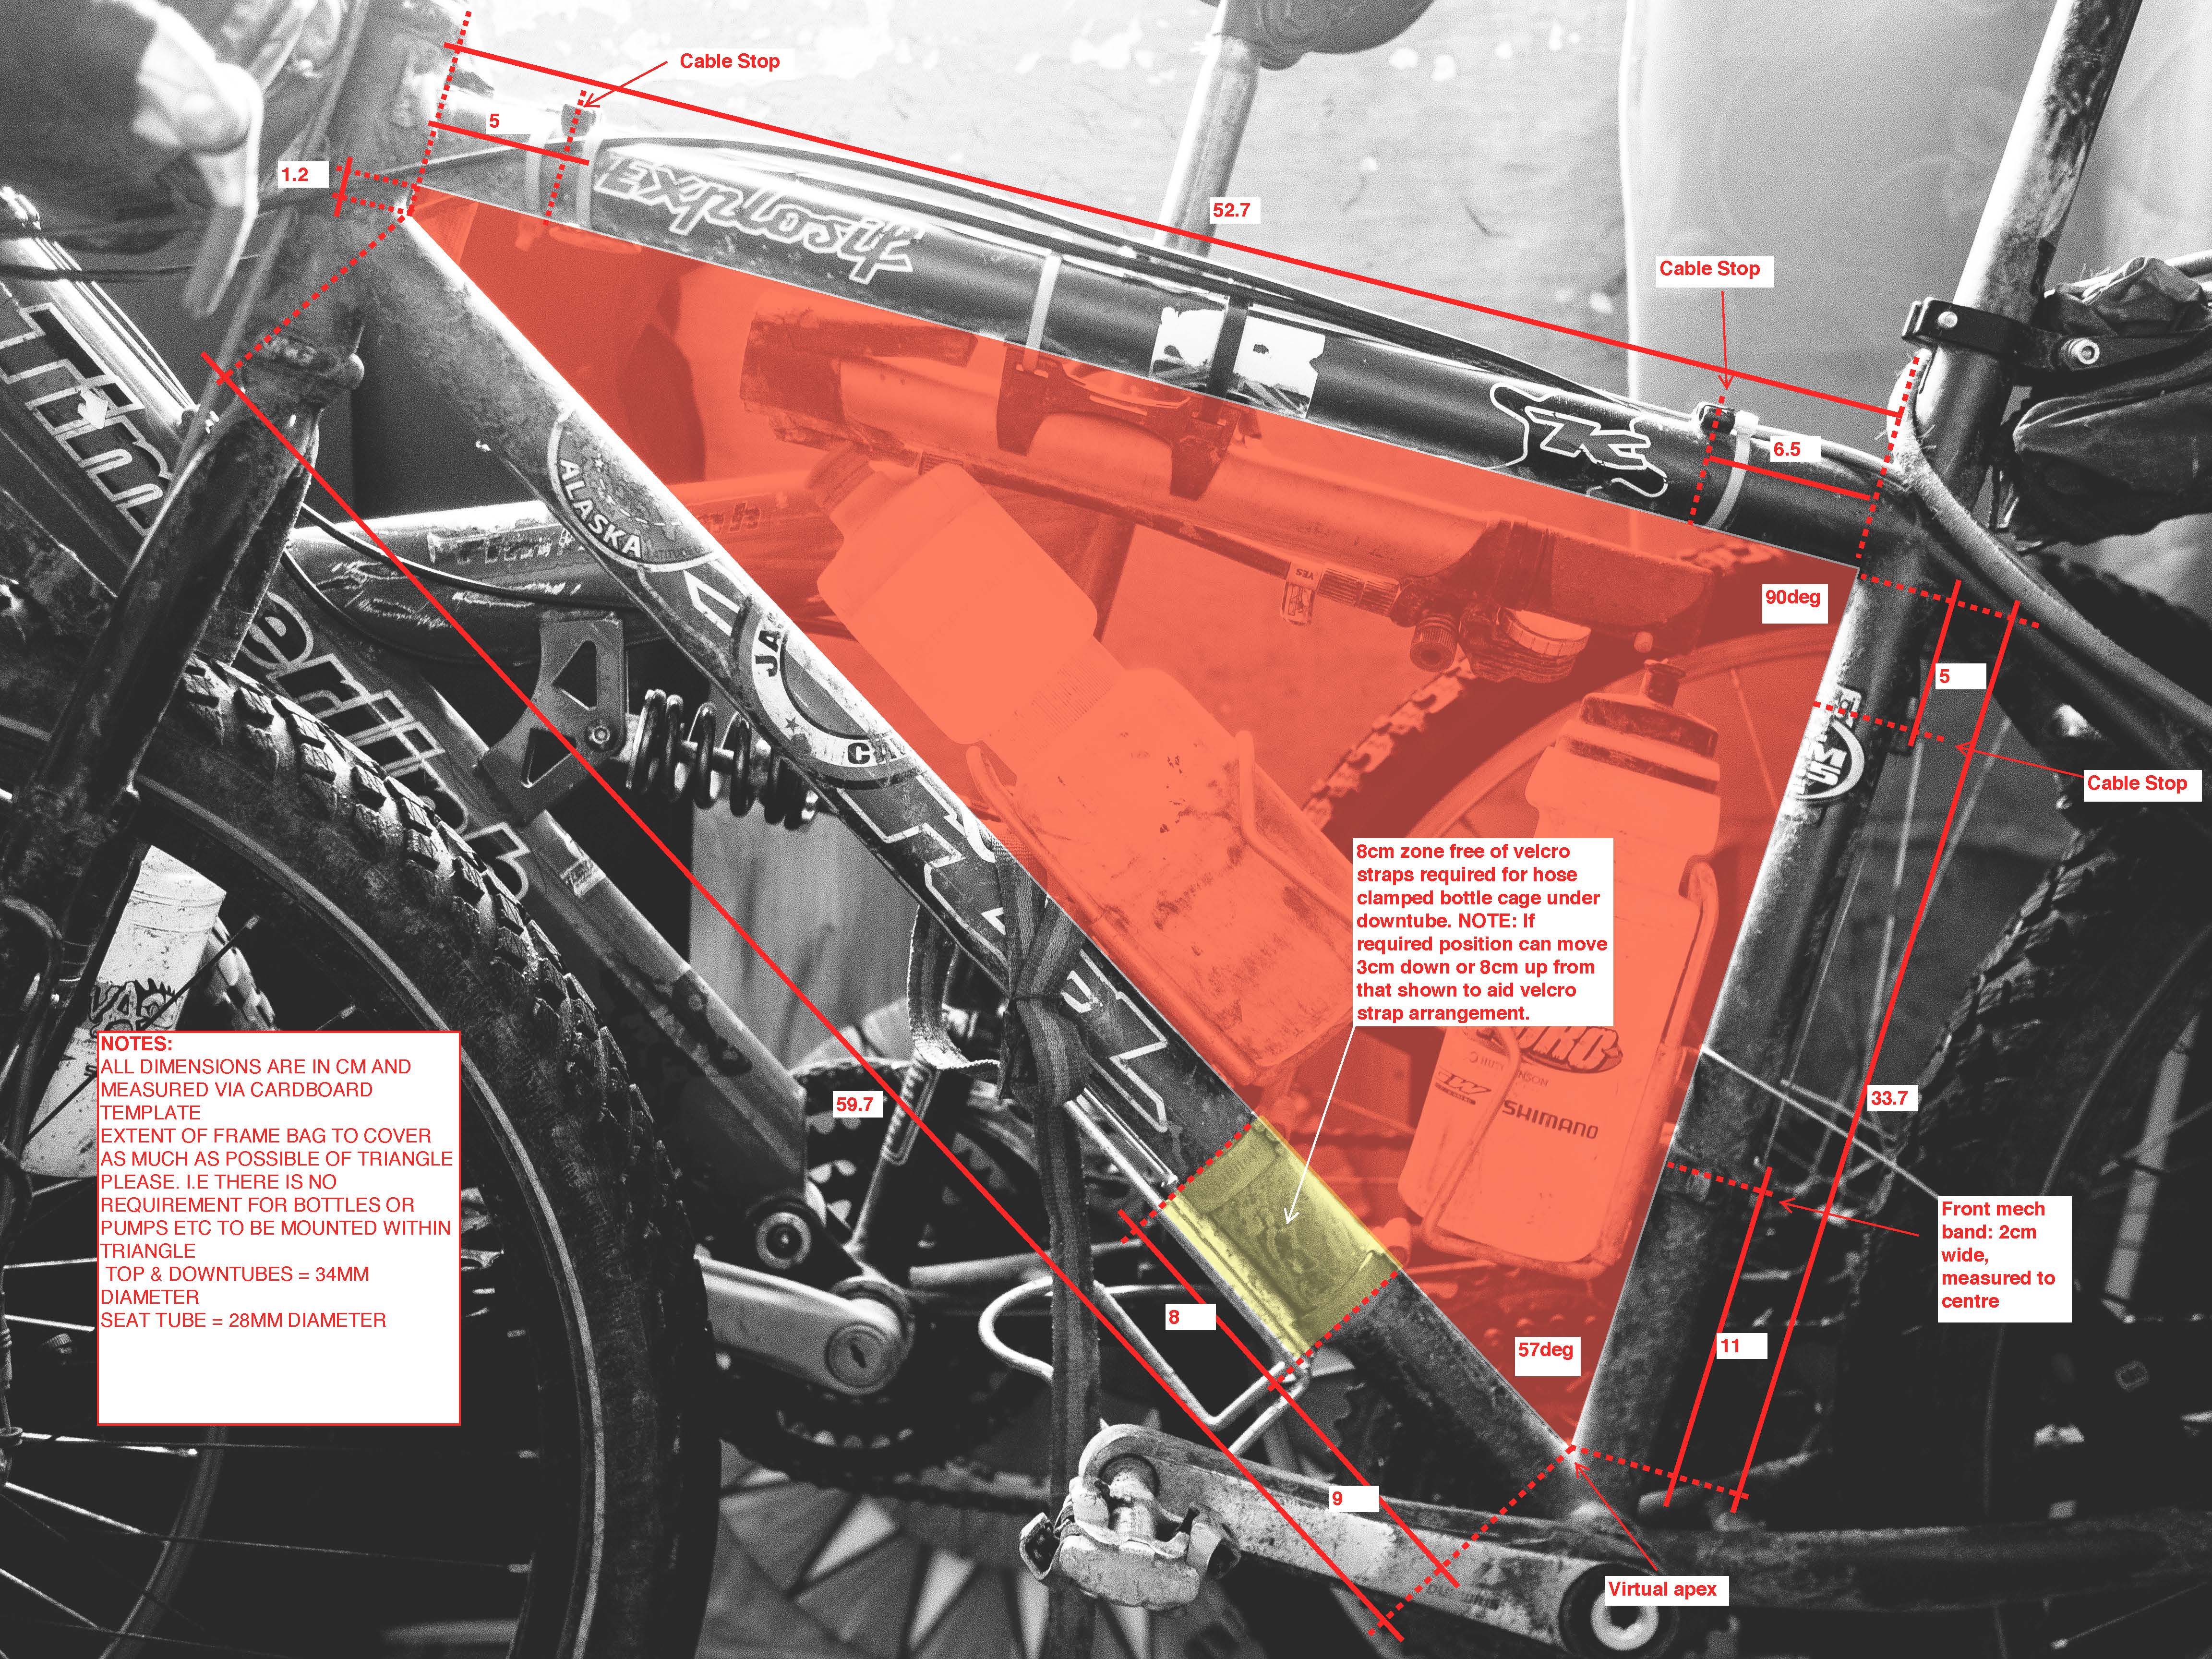
Sizing was based on my sketch, but I think the dimensions were treated a tad conservatively as it’s come out smaller than expected. This probably would have been avoided if I’d sent a cardboard template, as is usually the case.
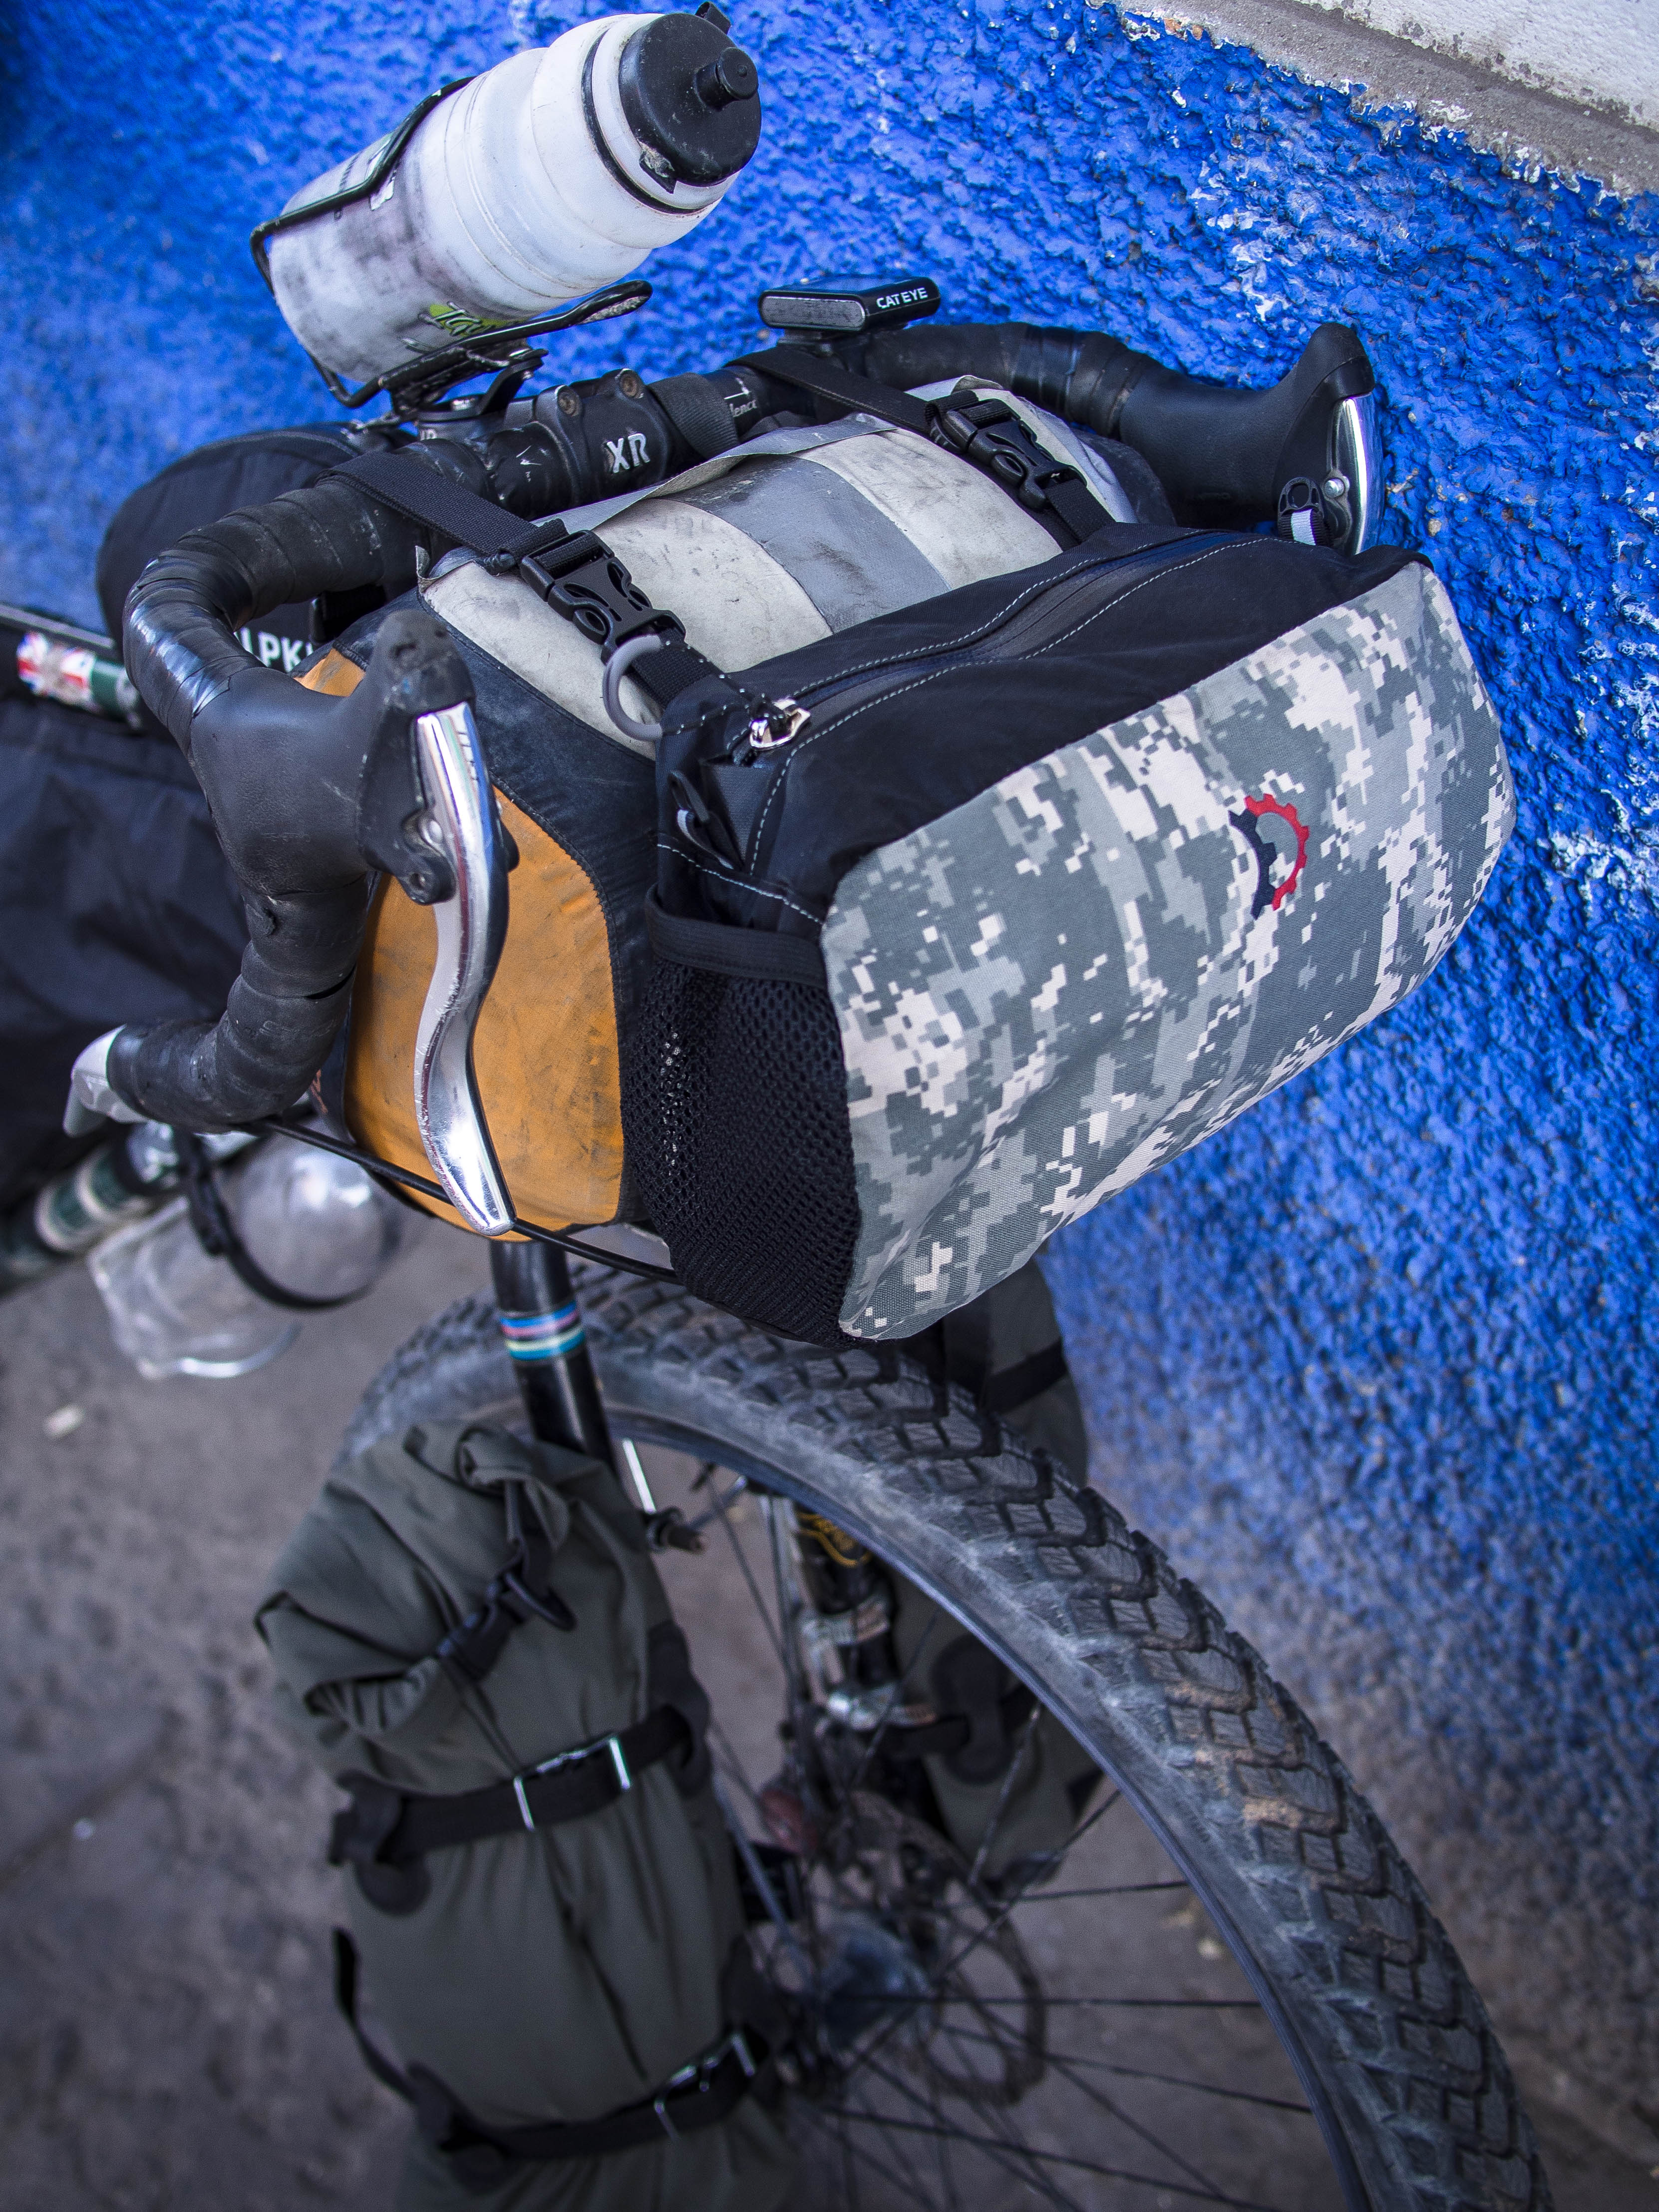
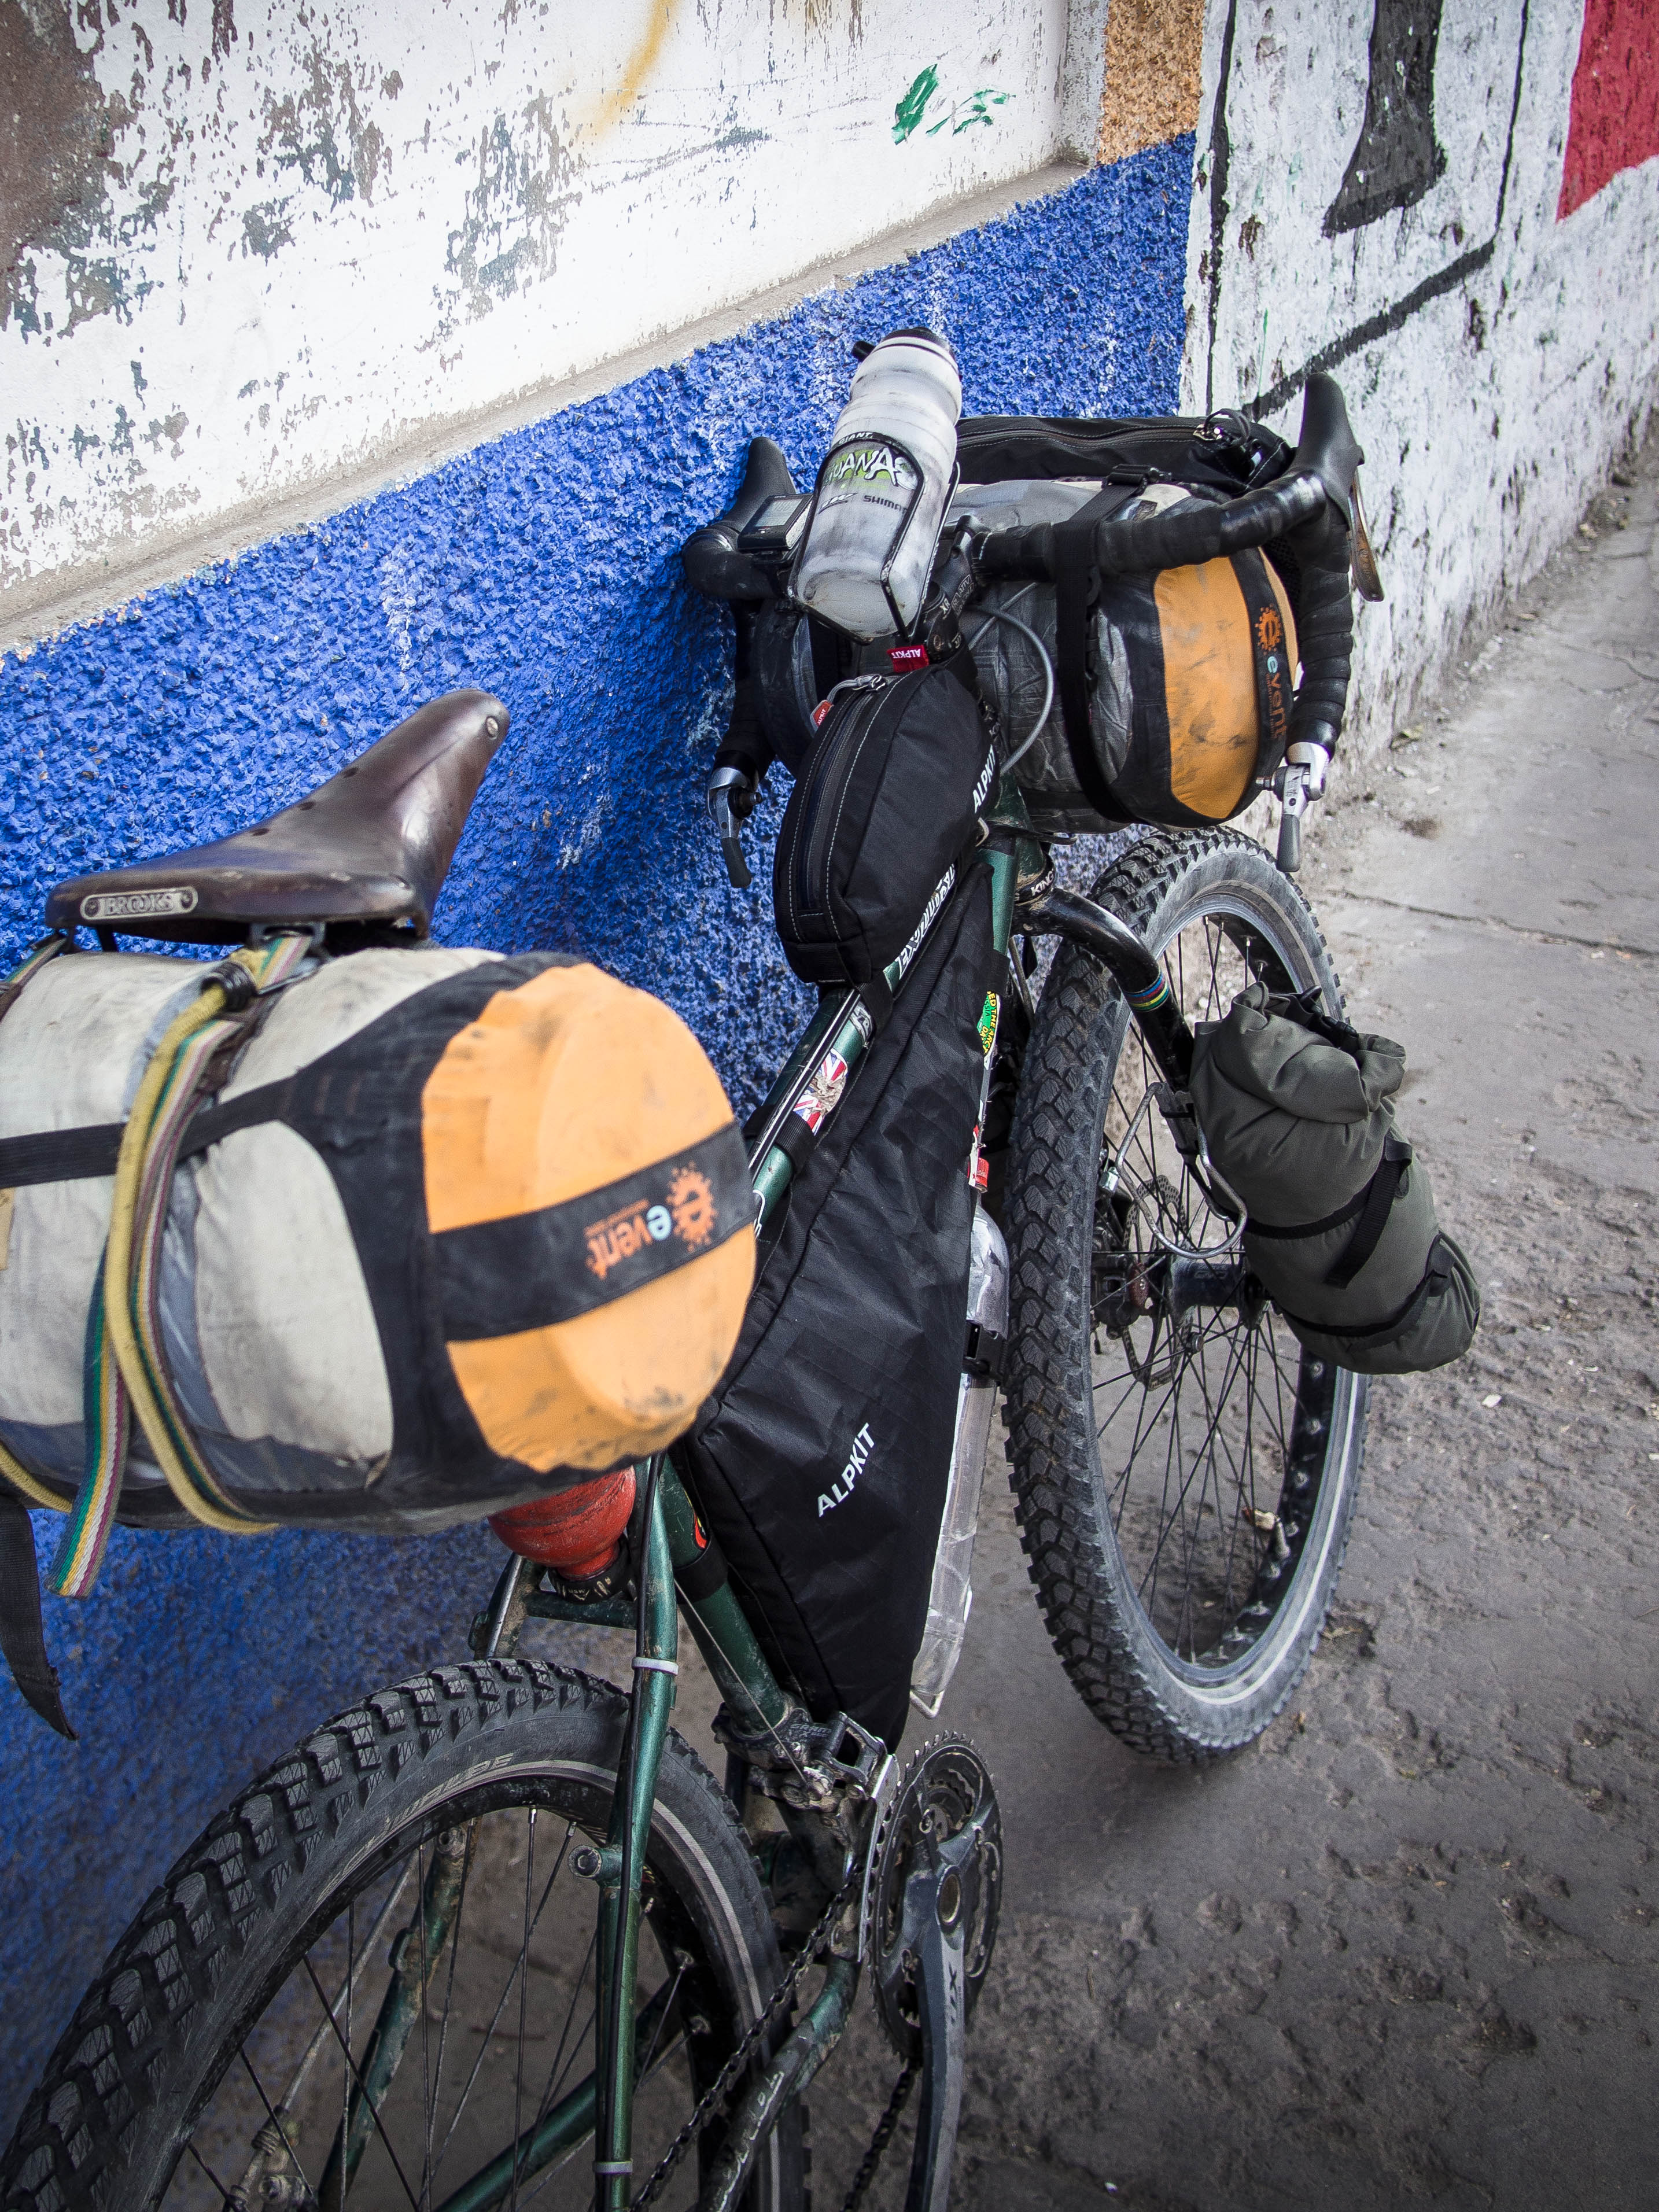
On the front I’m sporting the roomy ‘Pocket’ from Revelate Designs and a Sea to Summit medium dry bag housing the sleeping bag and thermarest. A stem cap bottle cage mount from King Cage is another new addition to help with the tricky water storage situation.
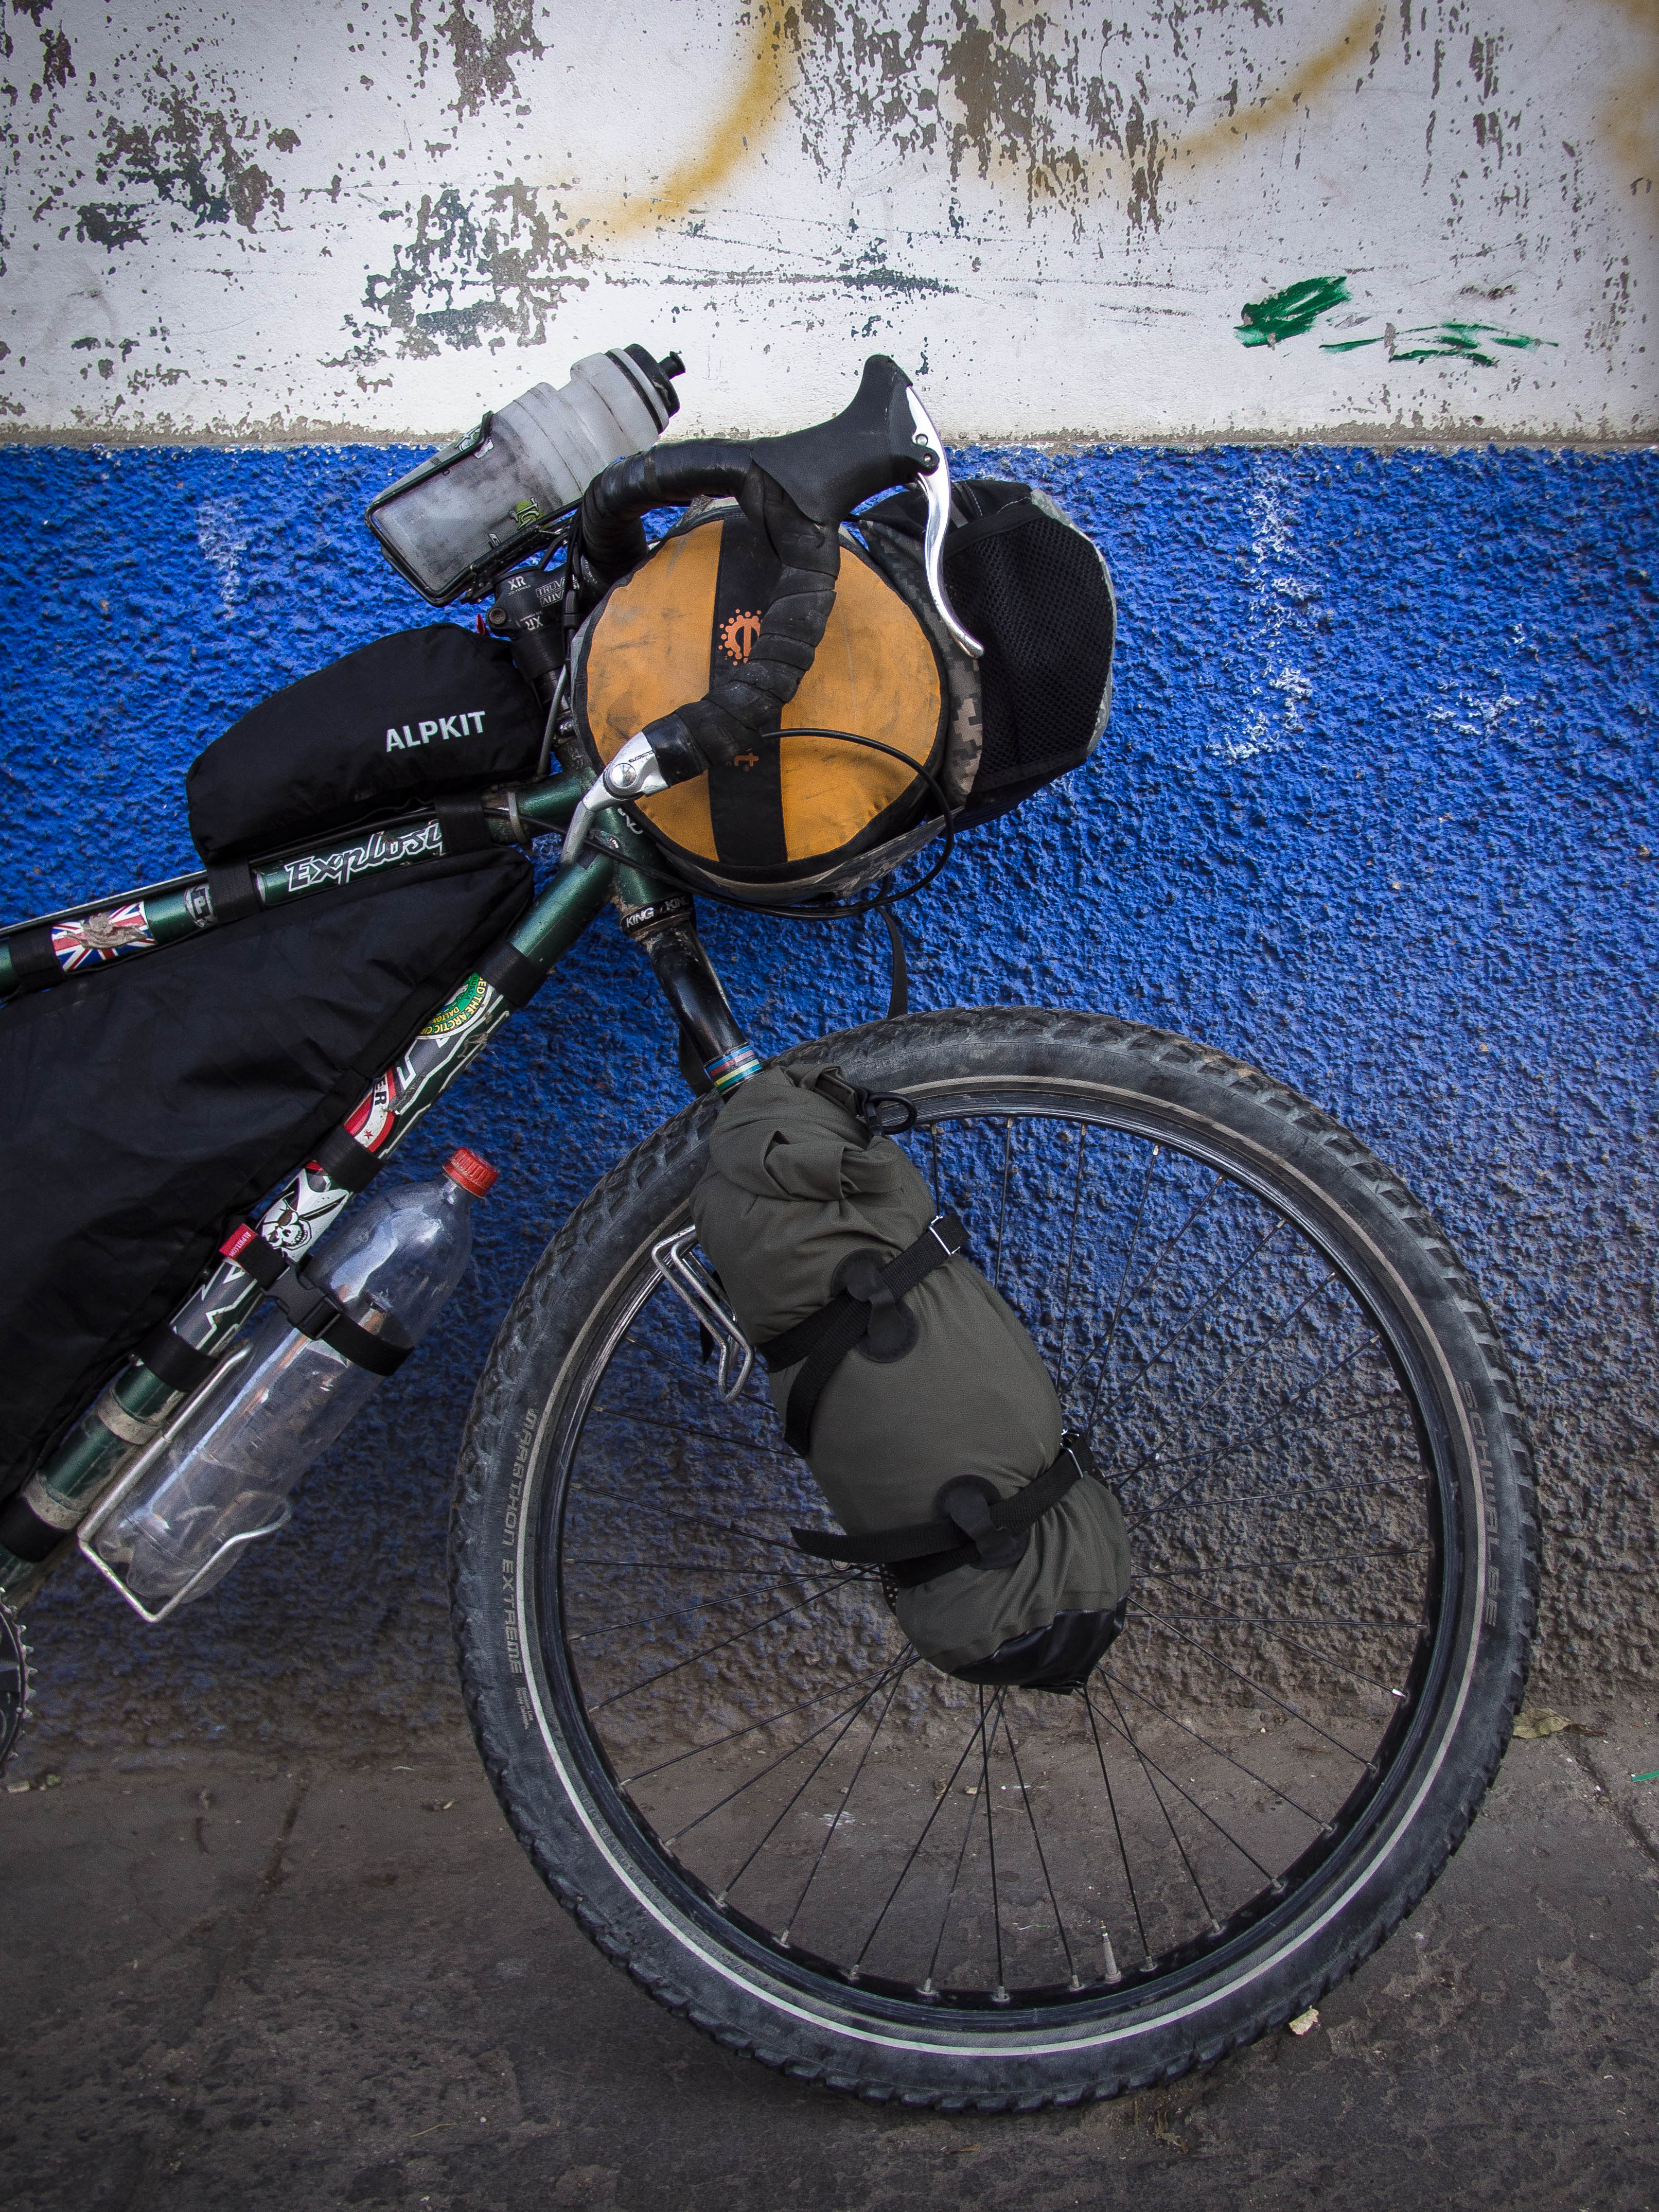
An 8L Alpkit dry bag is lashed to each fork leg; hiking shoes in one, and extra on the bike clothing for easy access in the other.
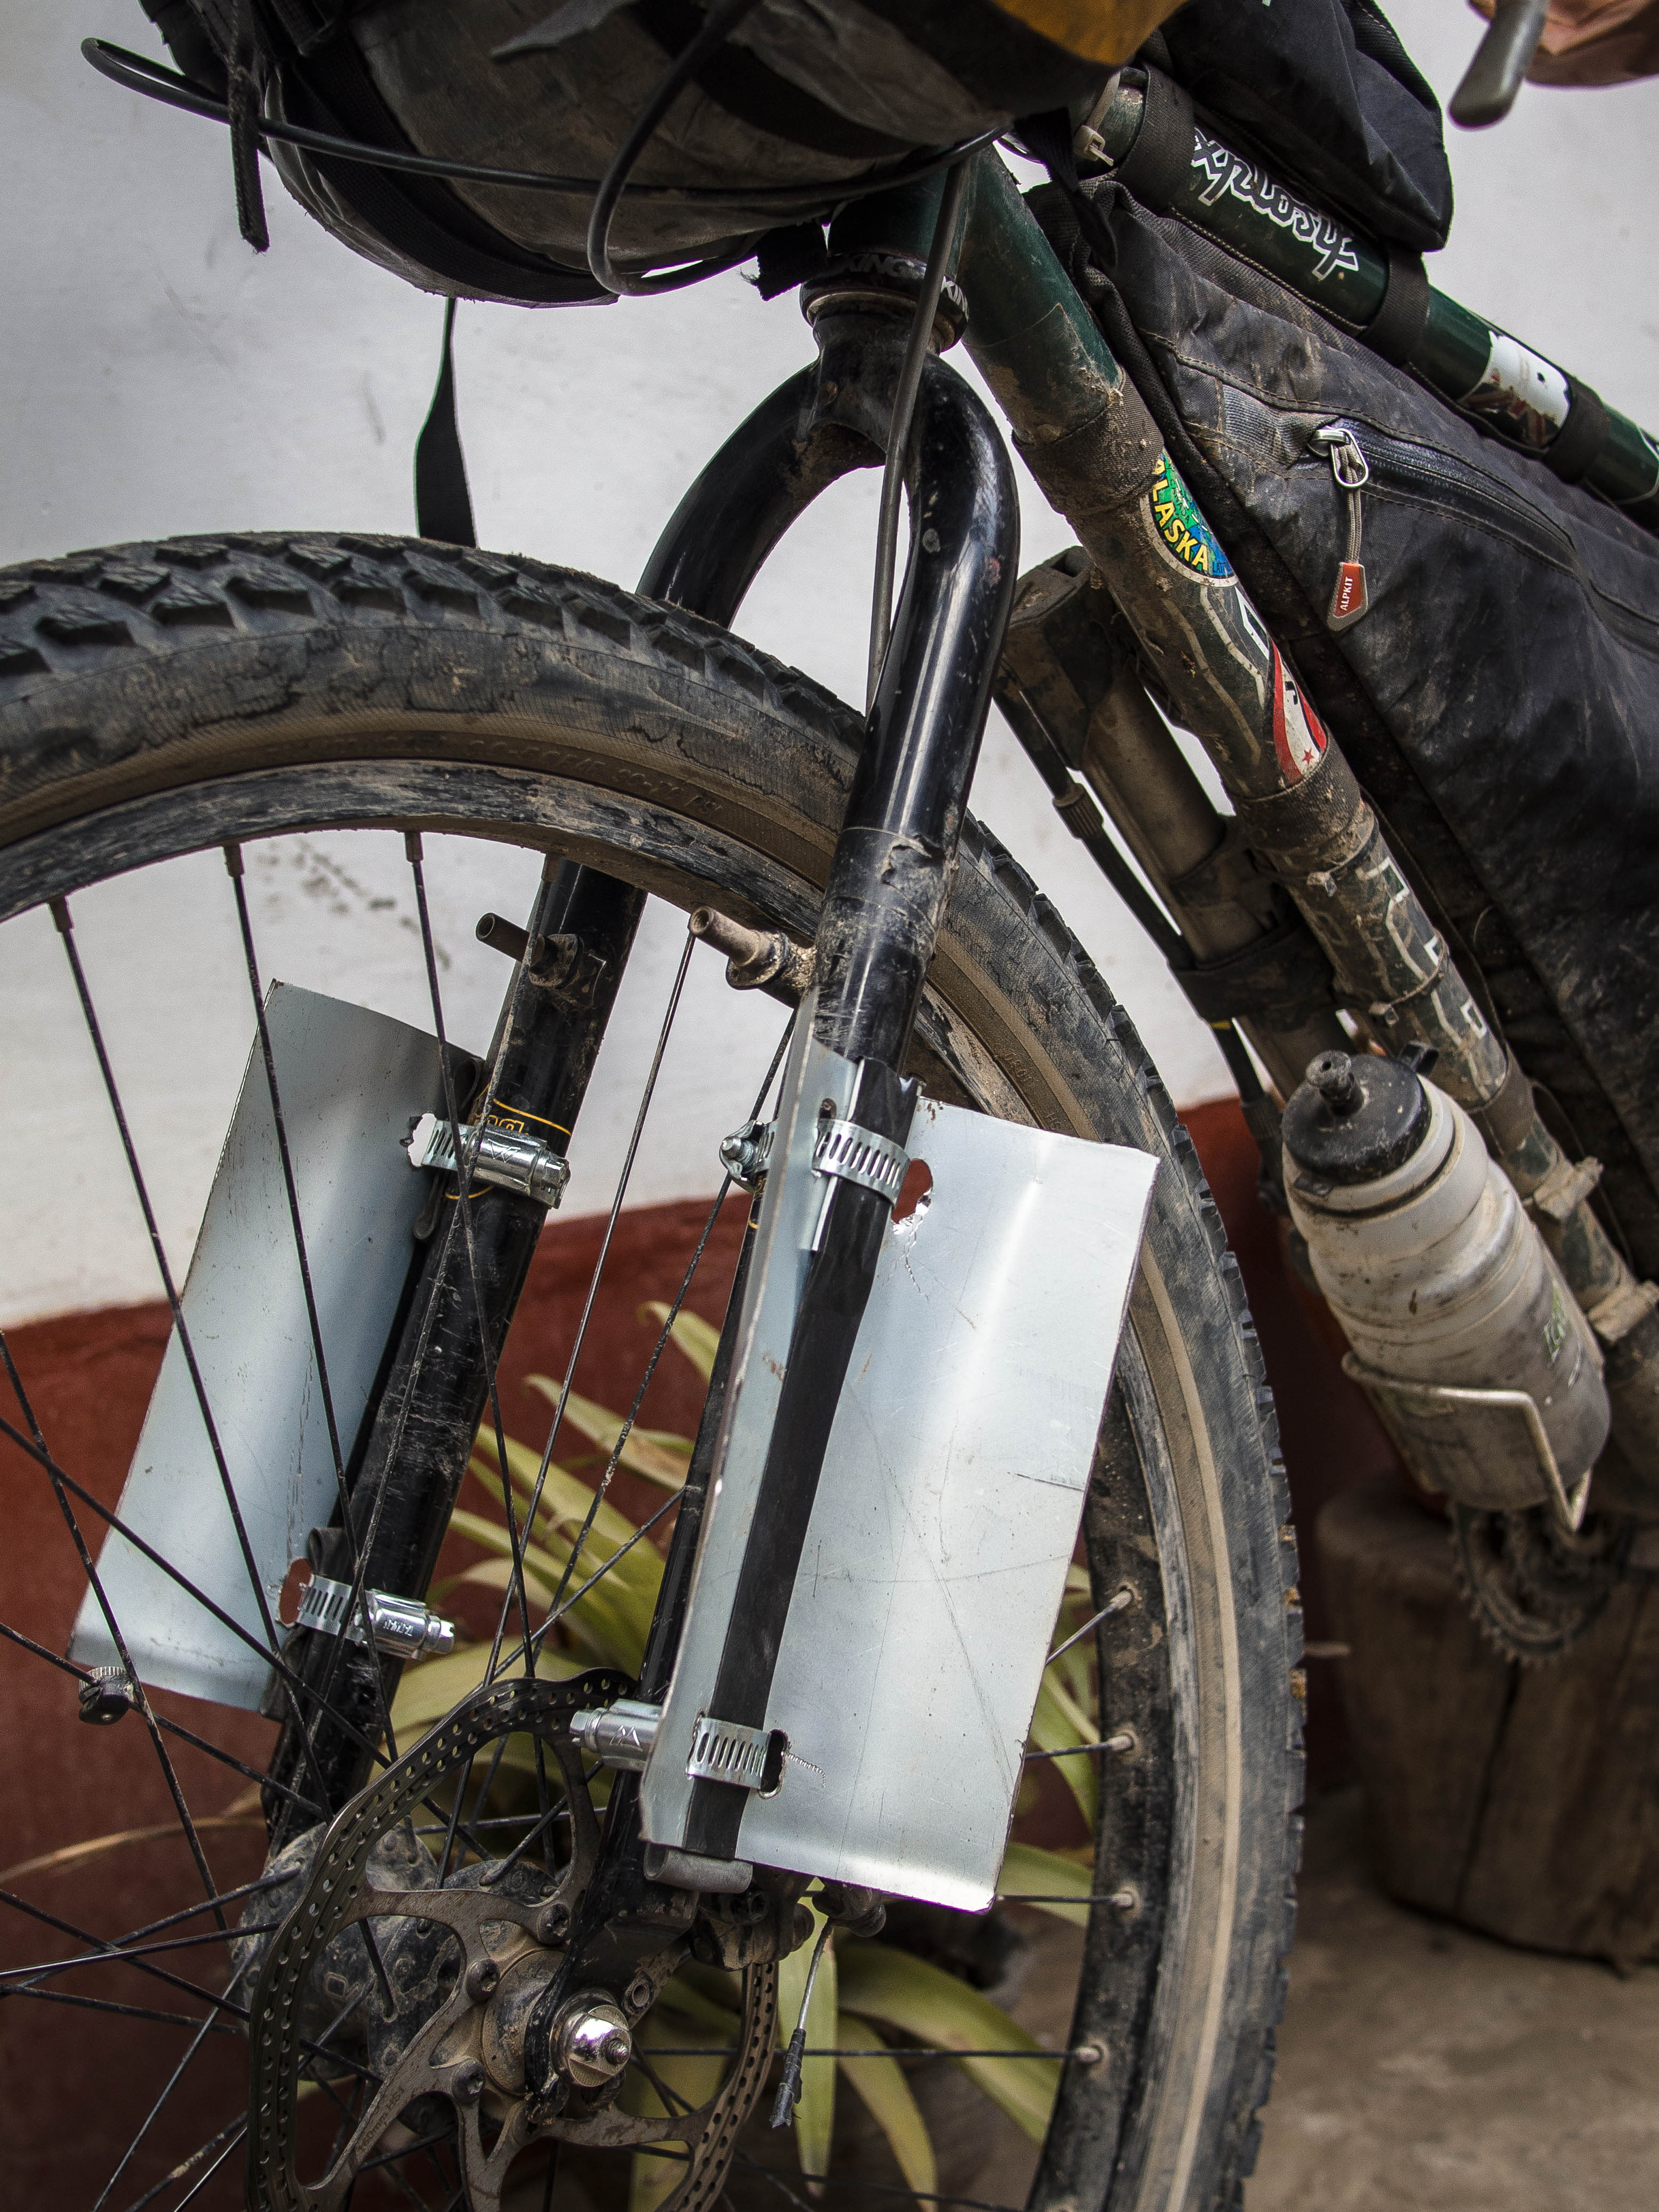
In the absence of a fancy ‘Salsa Anything Cage’ I’m using bent steel plates (cut to shape, with holes drilled for hose-clamping into position with a piece of old inner tube) to provide a little lateral support and prevent the bags from slipping round into the spokes. Note: I initially used half pieces of PVC tubing but these weren’t man enough…
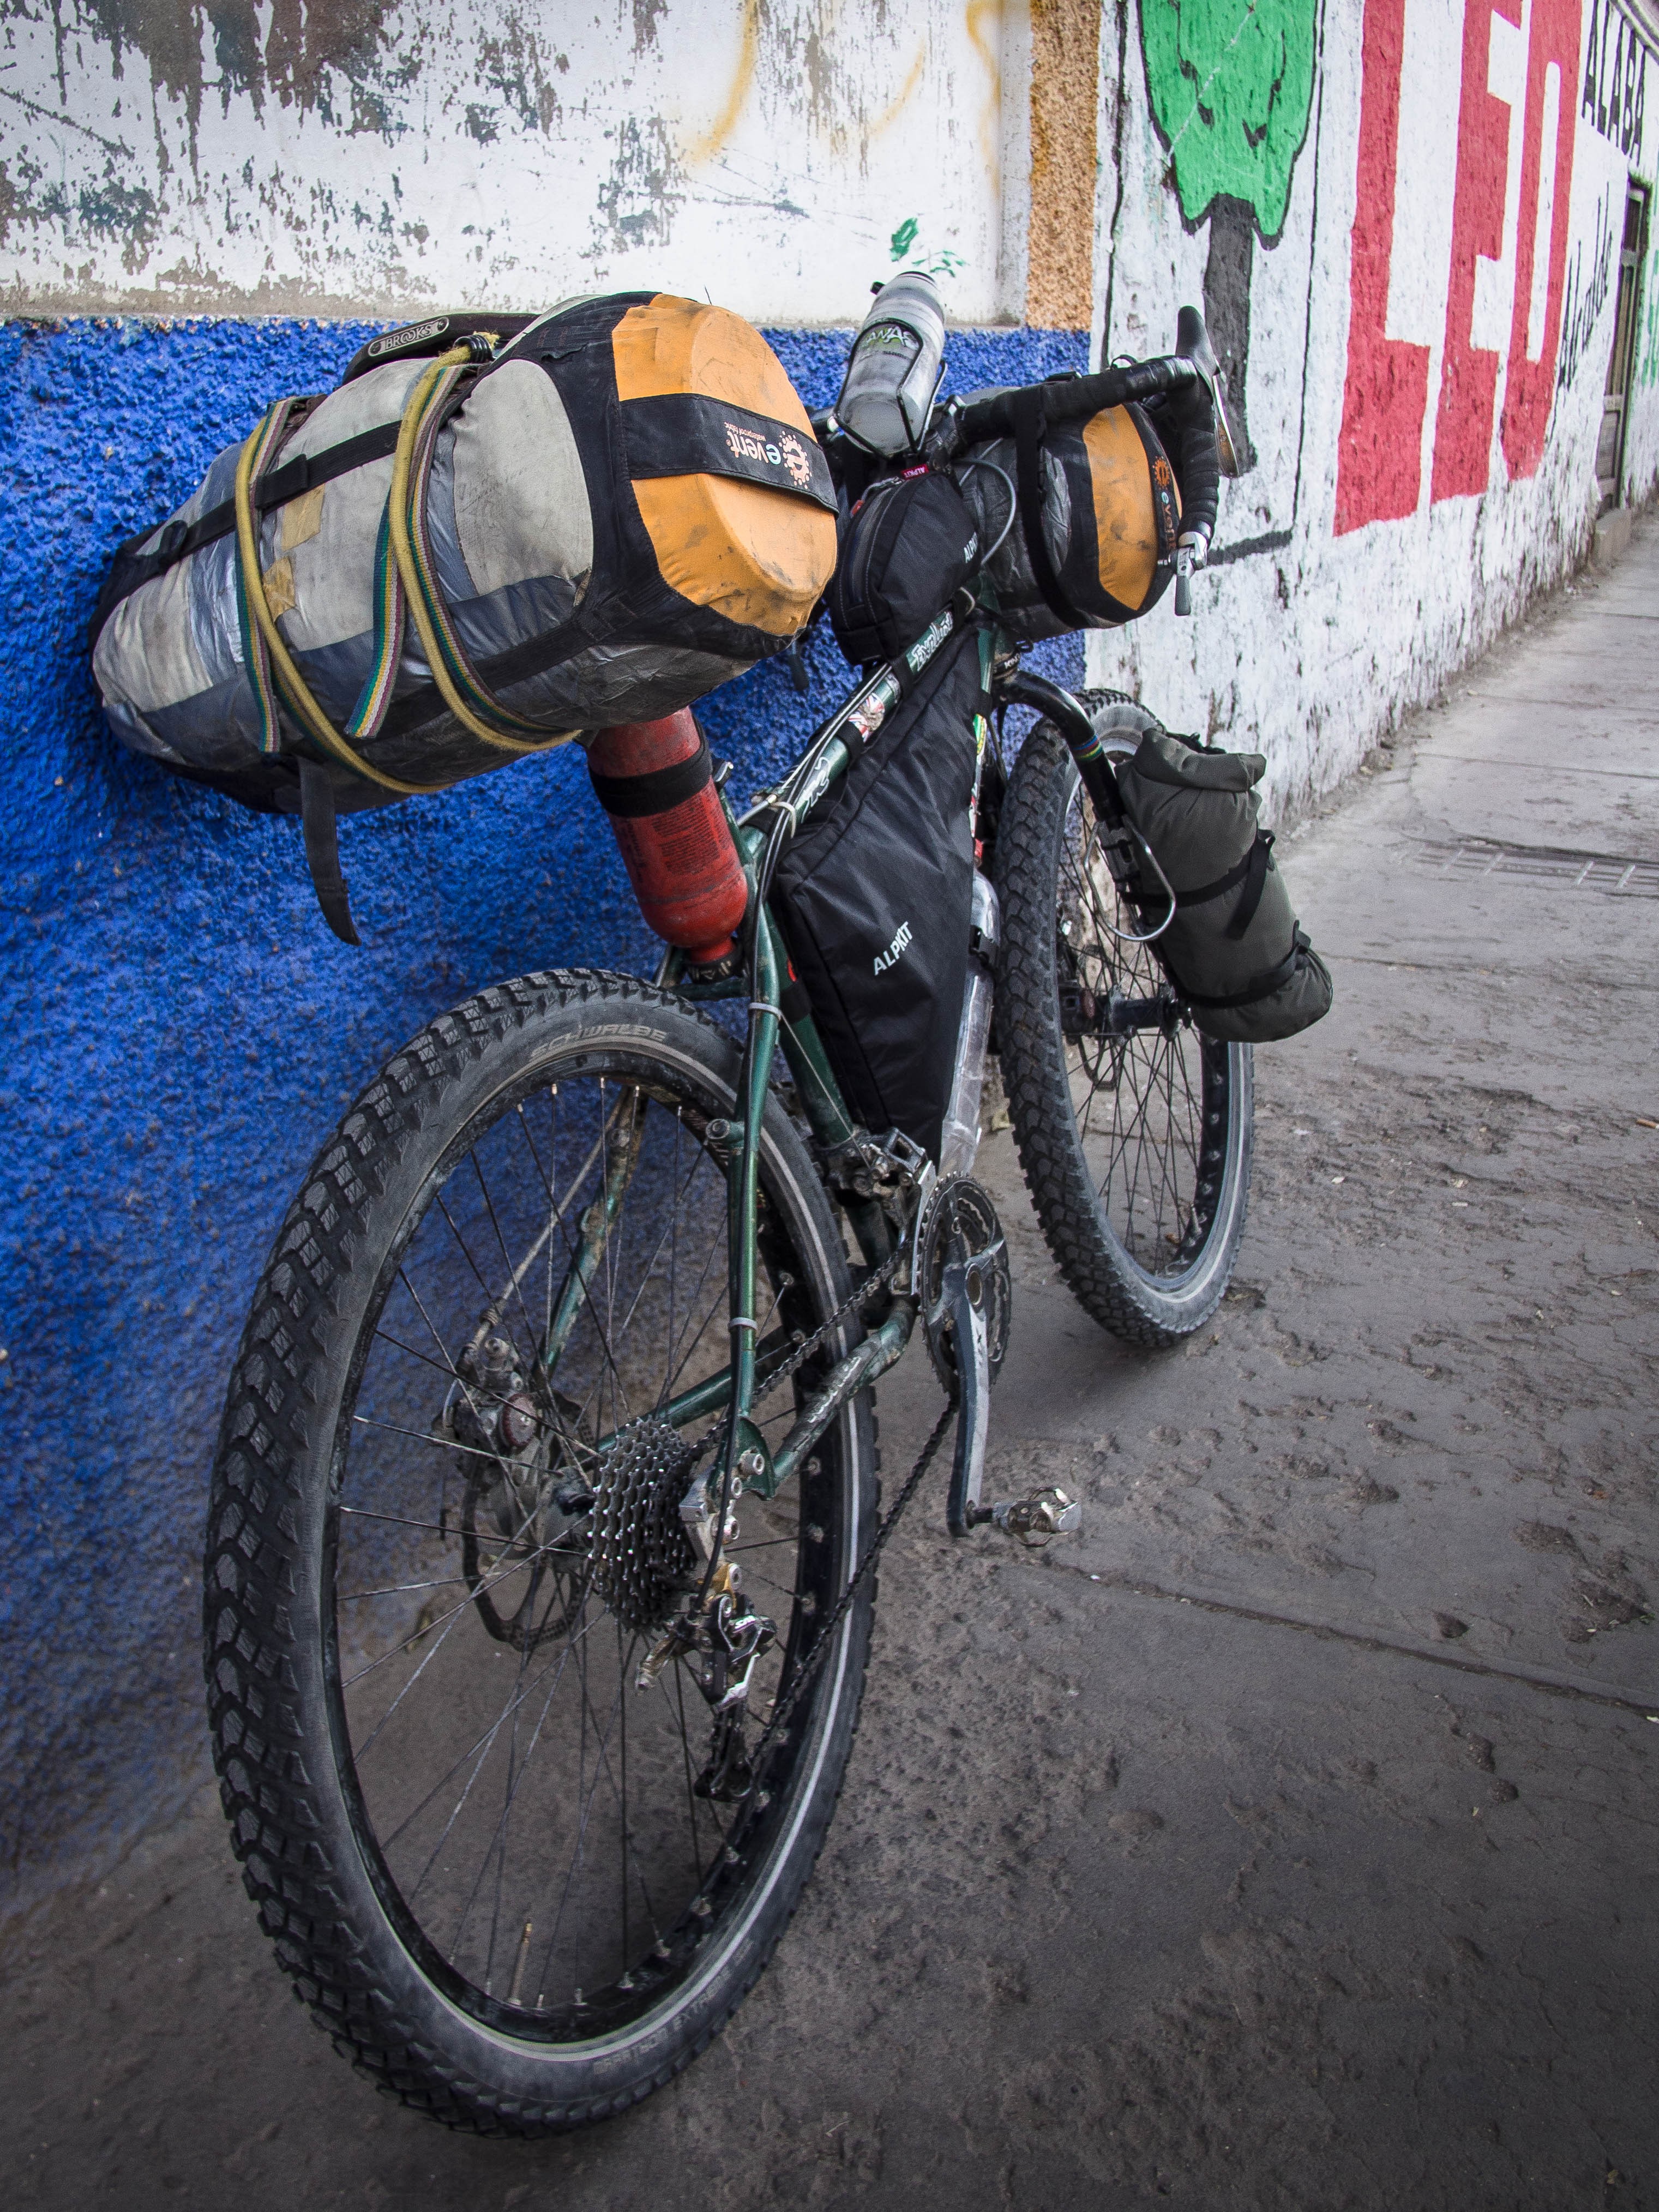
At the rear, as opposed to a handmade seat pack from Alaska, I’ve simply lashed my other Sea to Summit medium dry bag to the connection points on the back of the Brooks saddle (quite handy). A bungee back to the seat post provides extra support and compresses the main bag against a smaller bag containing the tent fly (necessary so as to maintain leg clearance).
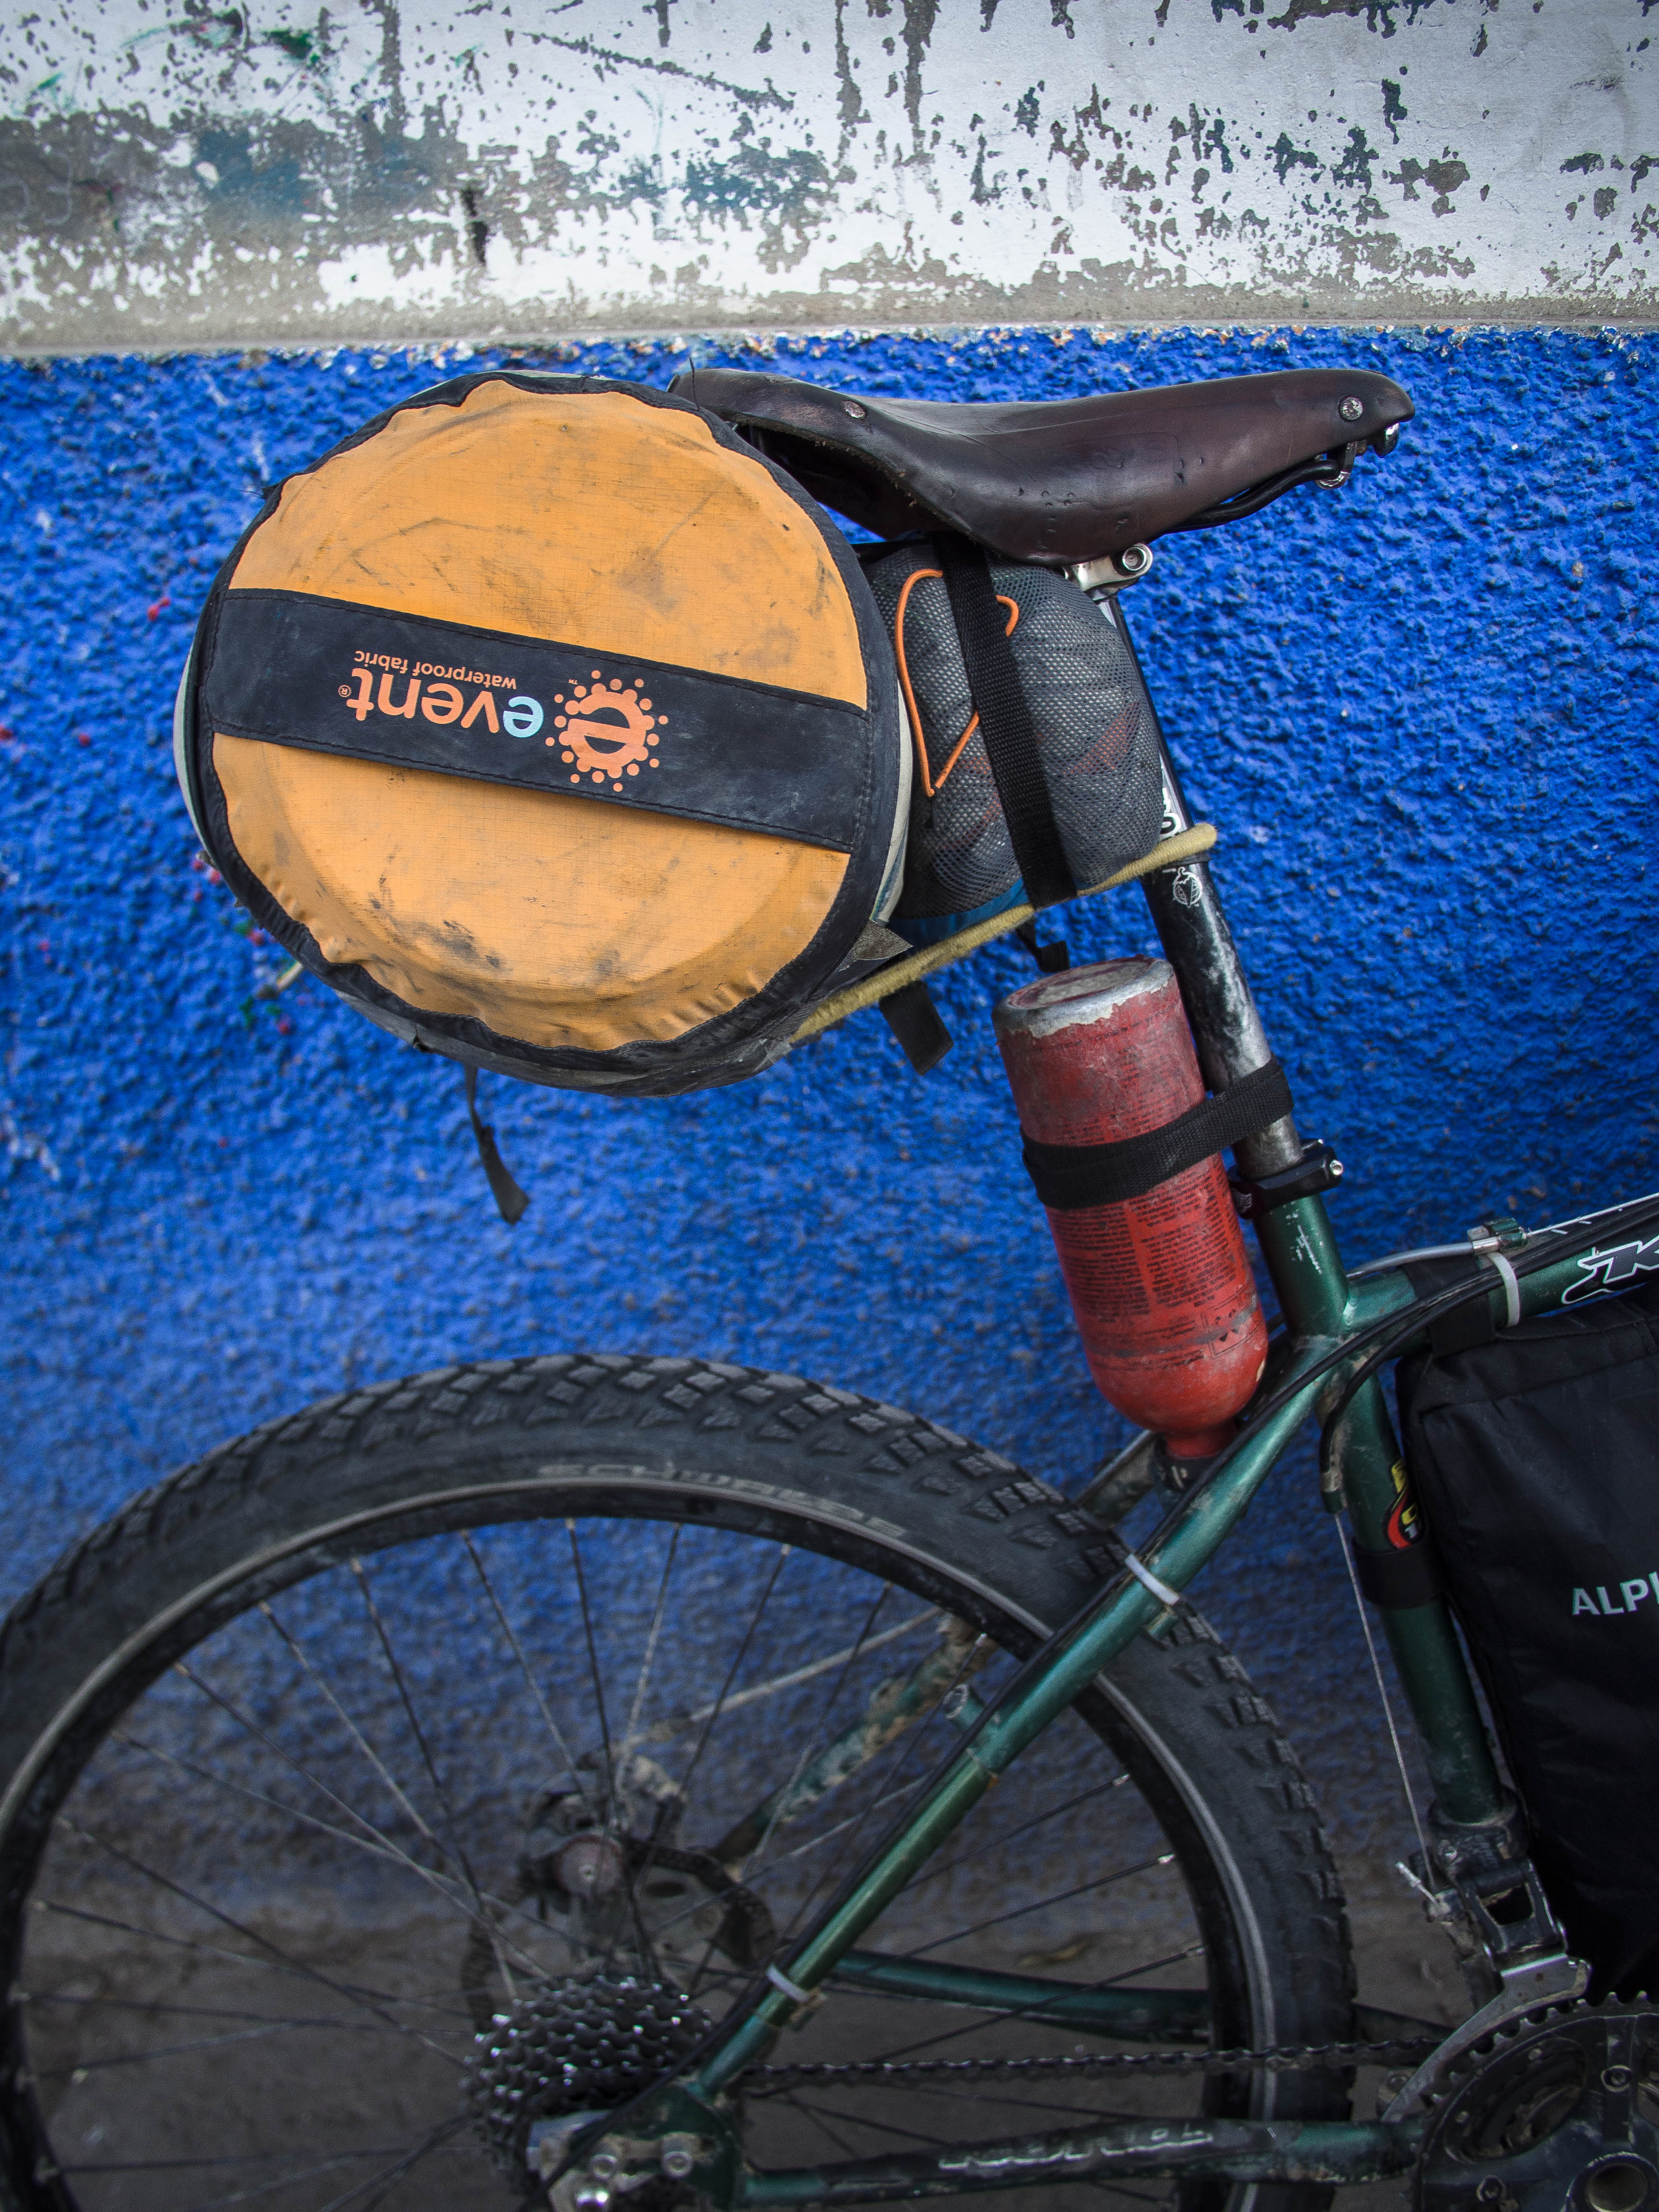
The result is surprisingly solid.
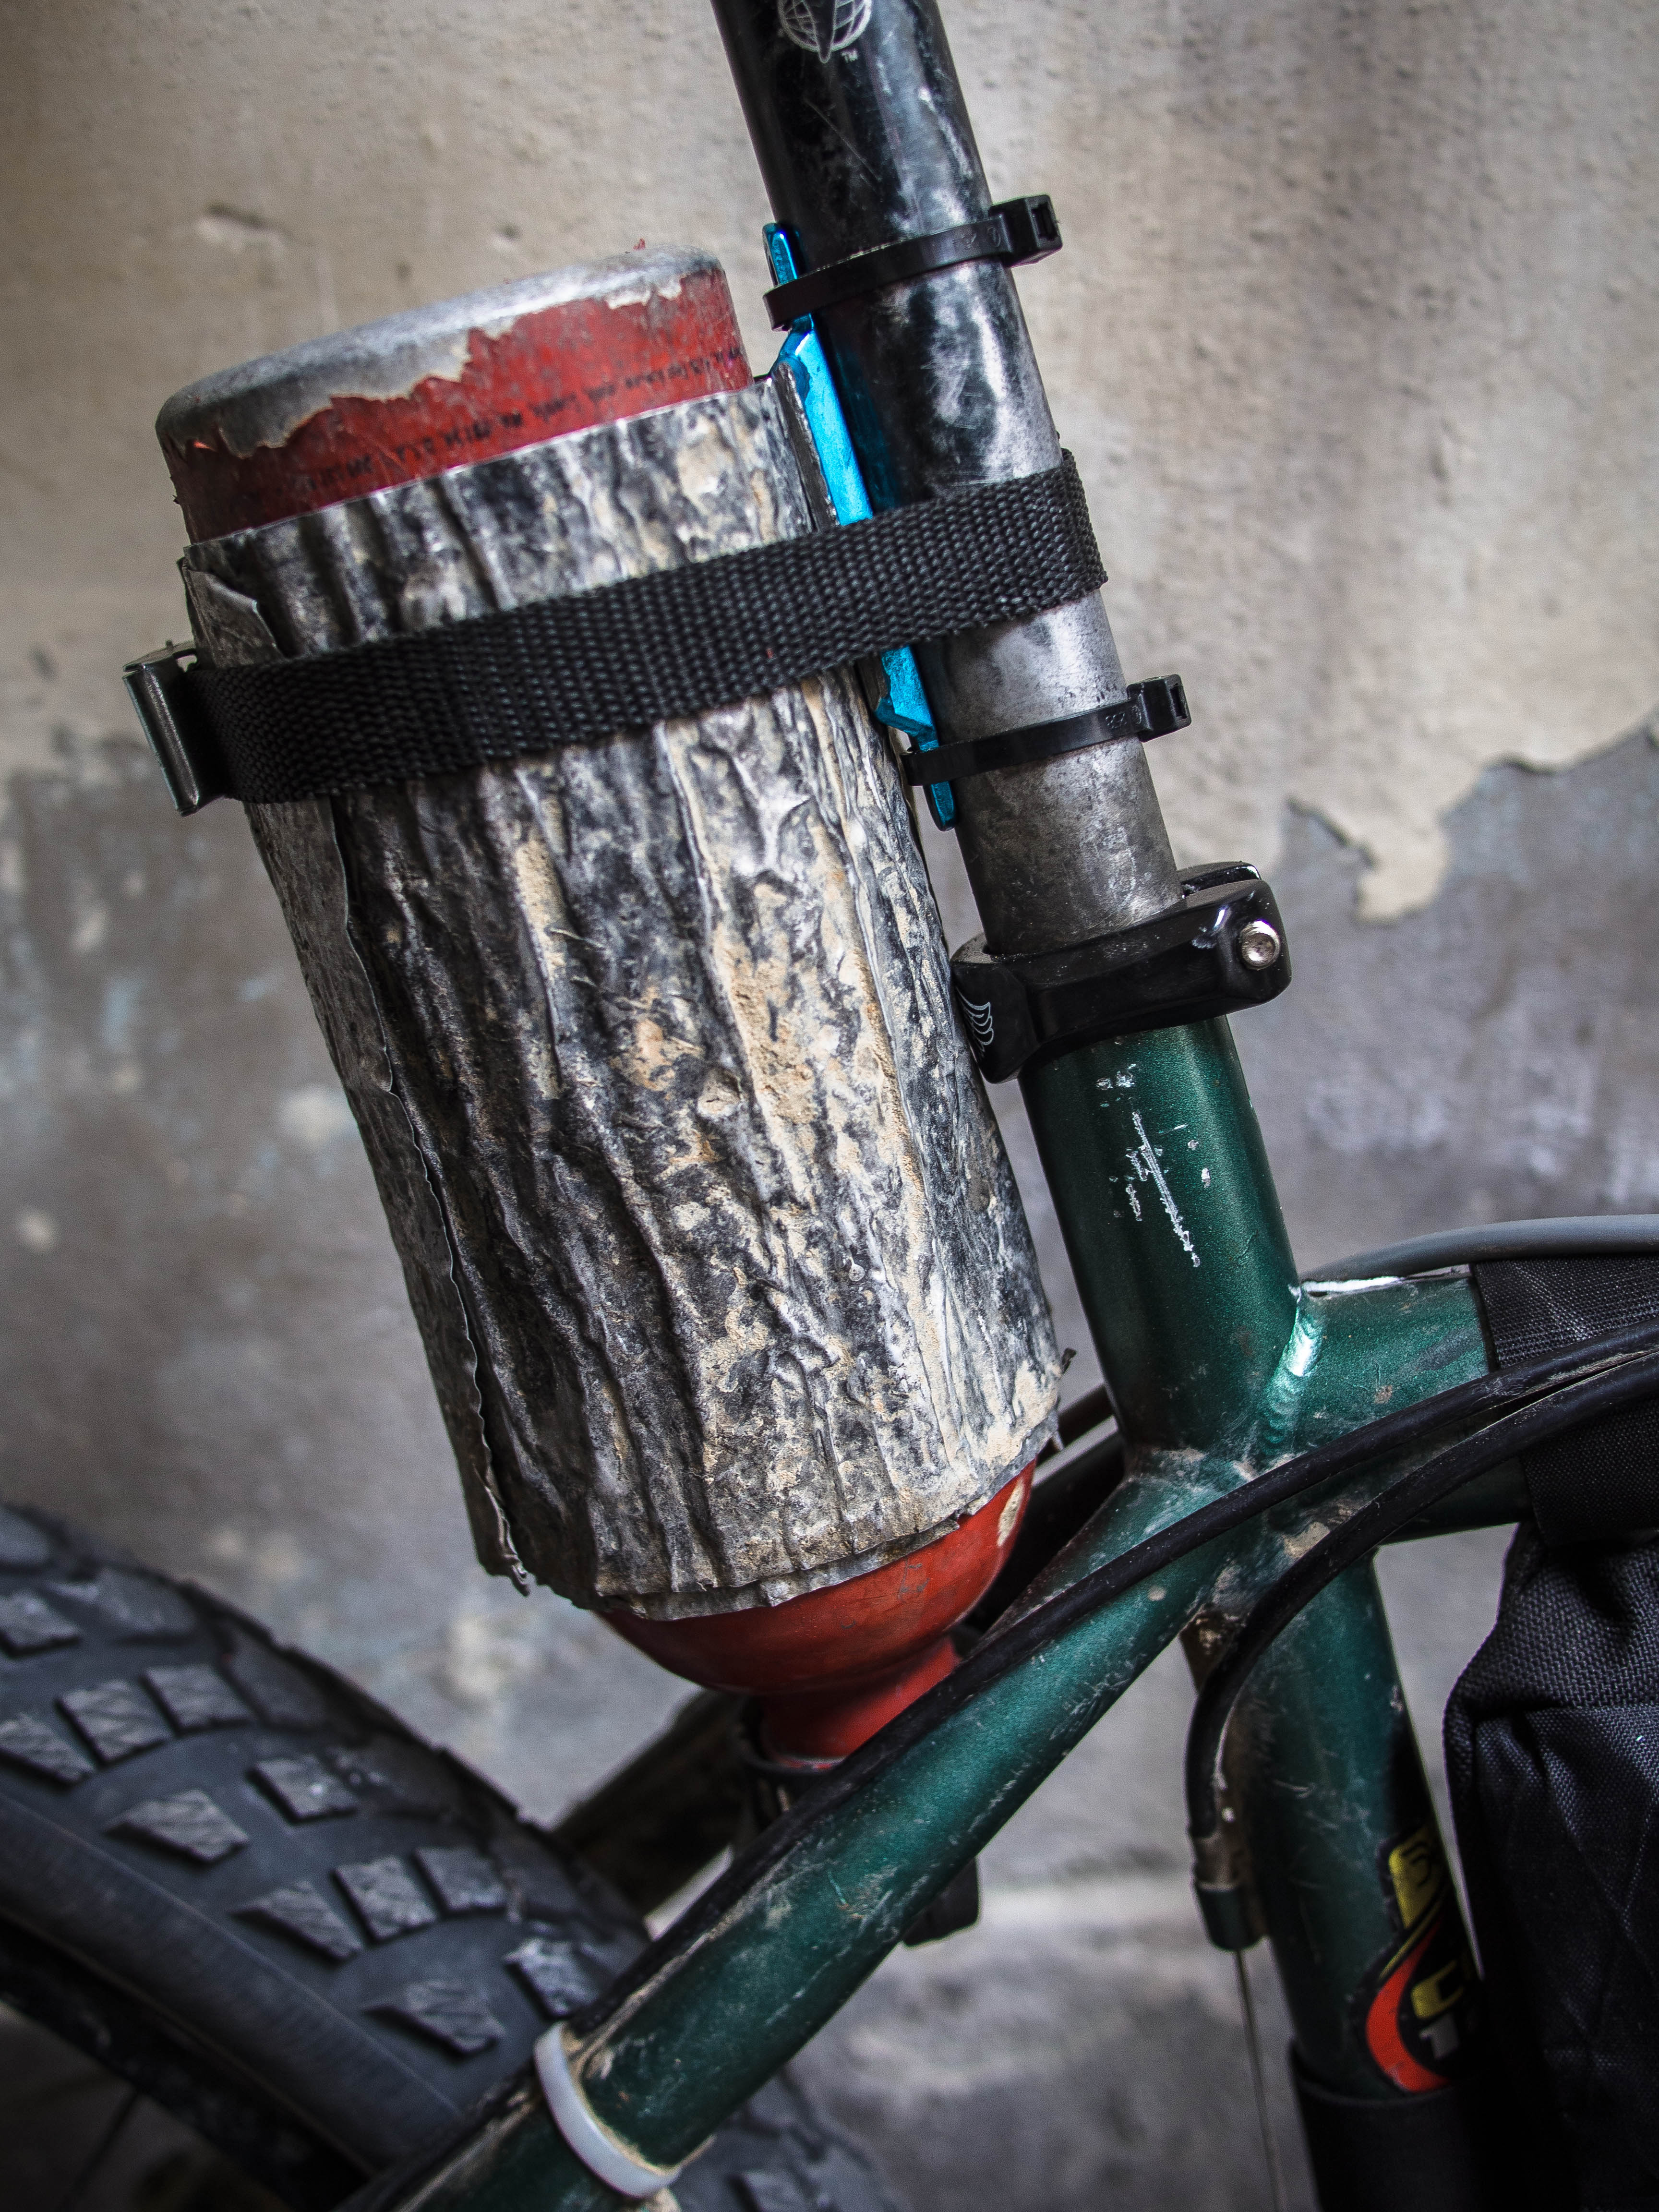
To complete the chaotic look the fuel bottle is stuck on the seat tube, using part of a broken bottle cage for support.
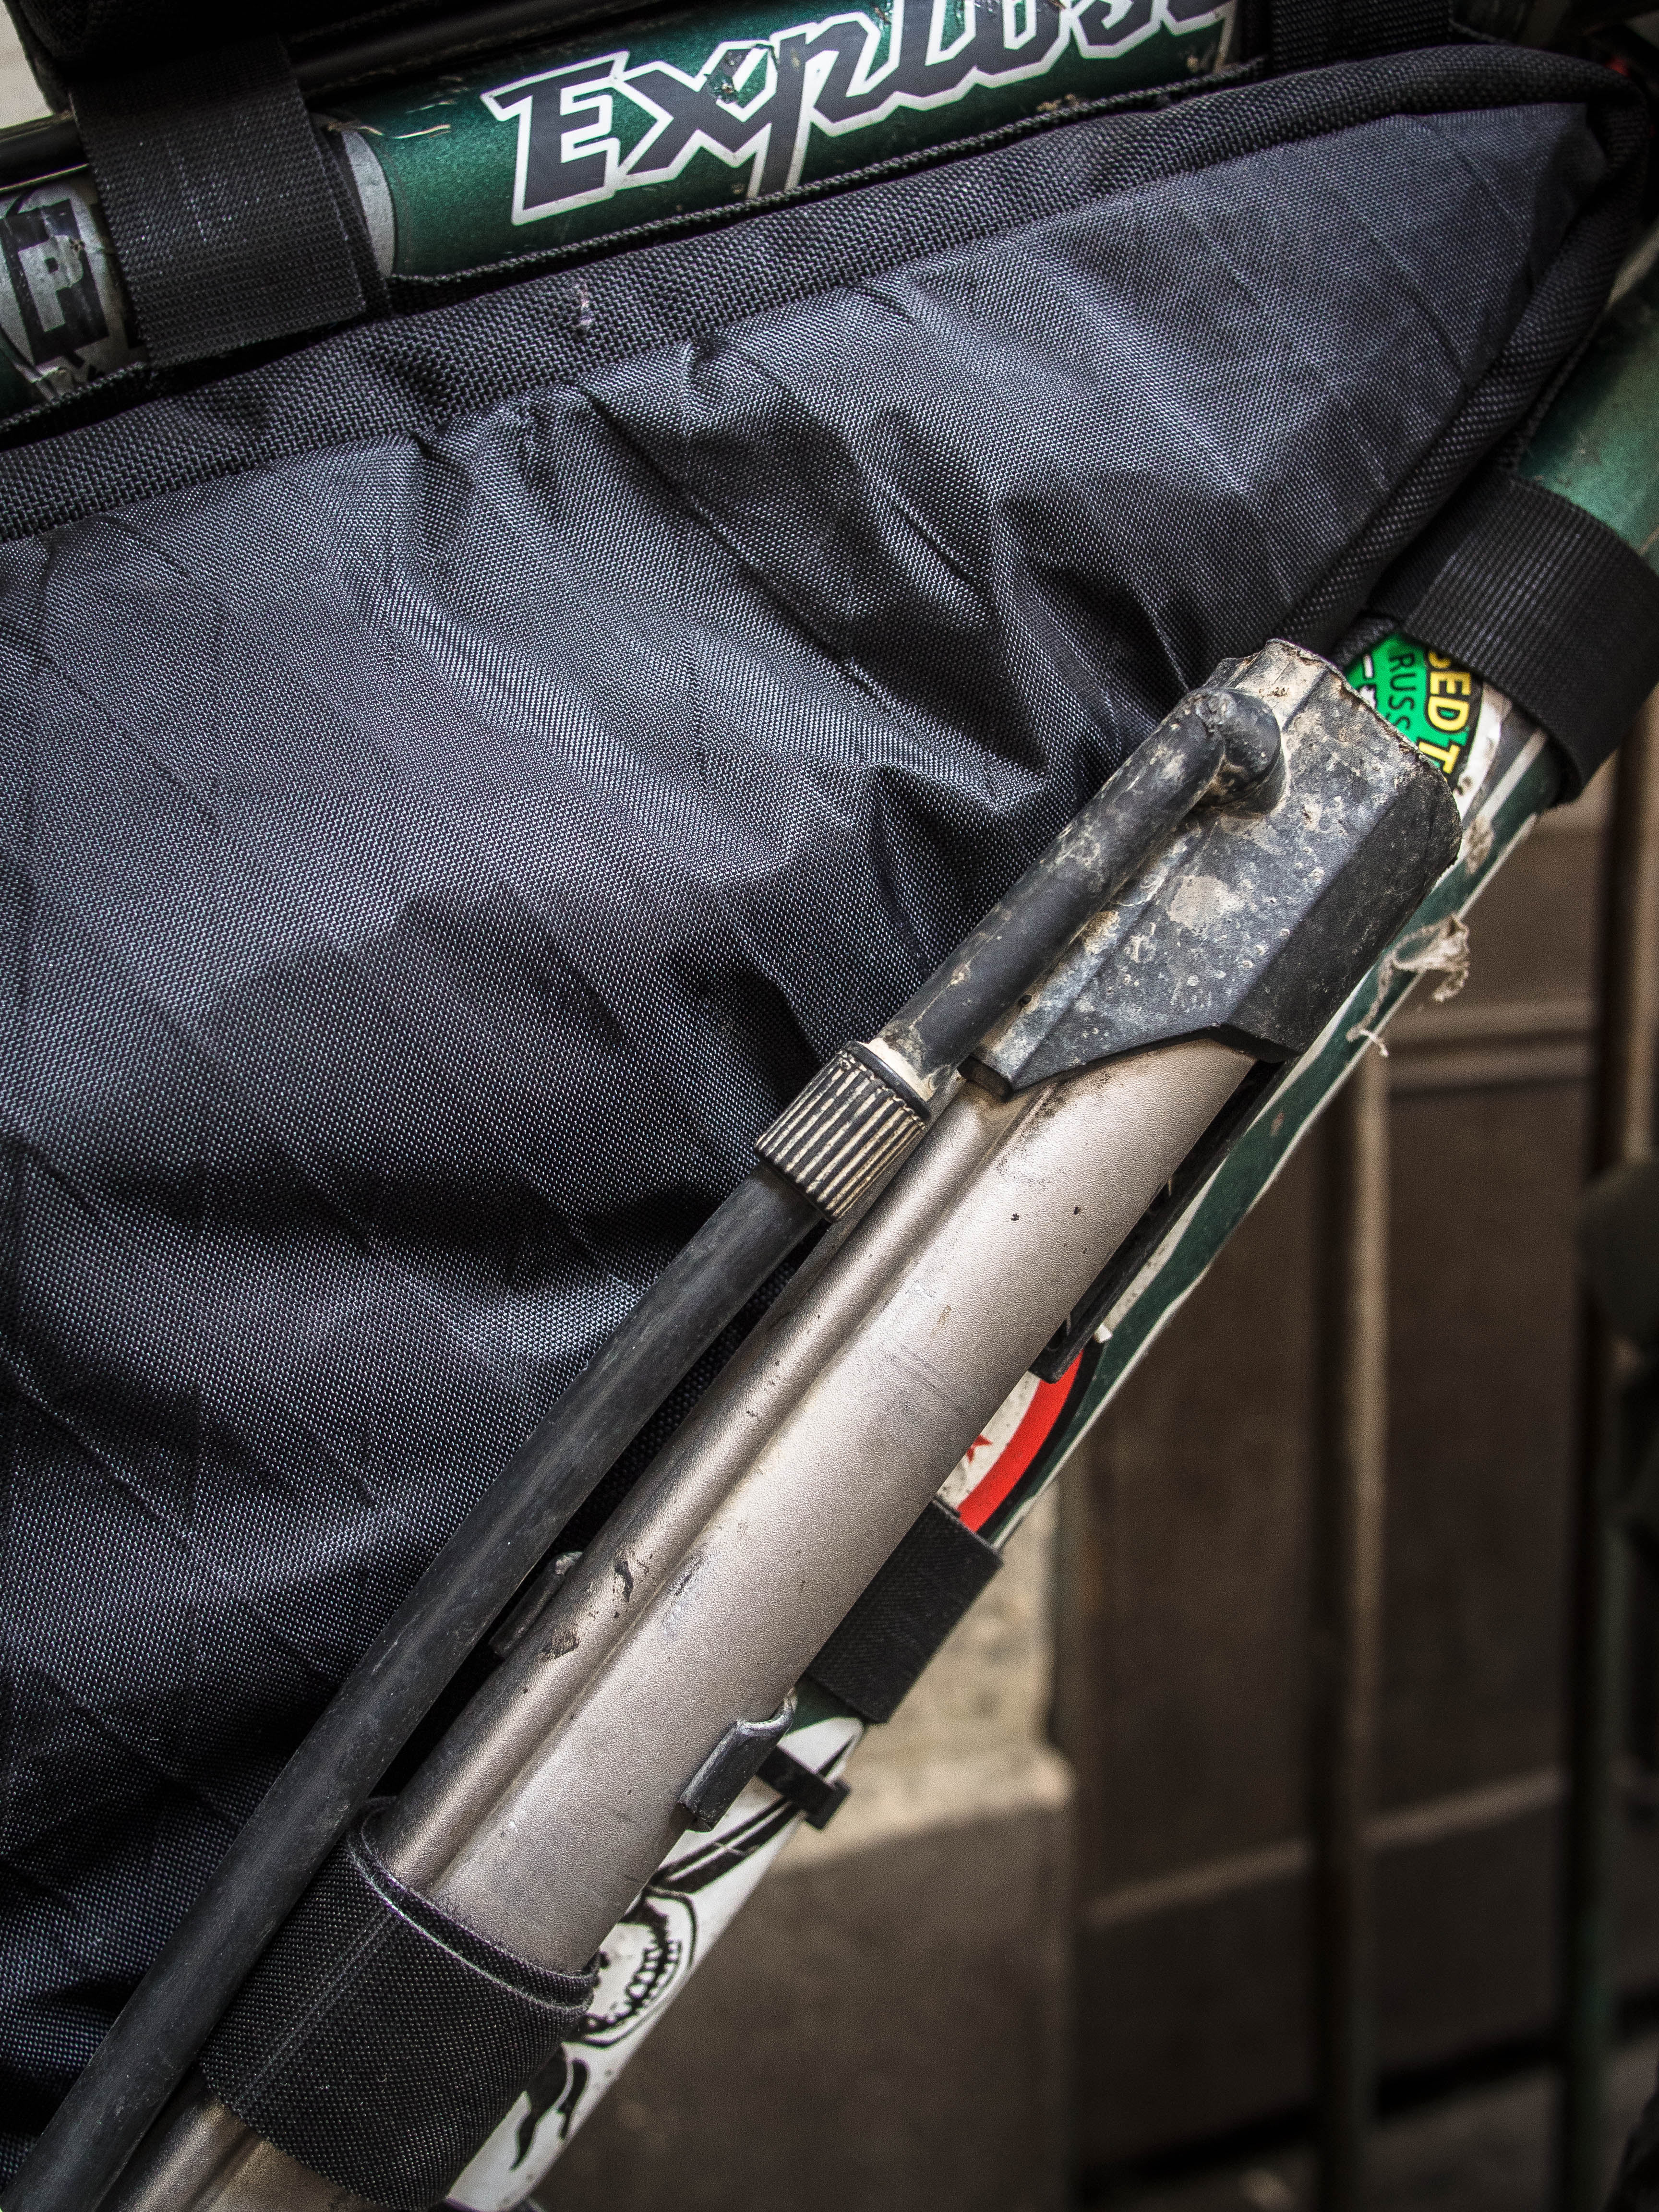
And the pump has found residence on the downtube…
If this isn’t enough gear geekery for you, there’s also an updated kit list here.

You are such an engineer.
Nice sketch (or should I say highly sophisticated blueprint!)
The touring world needs people like you. I’ll be using some of these ideas. Let us know the durability /quality of the alpkit bag and how you go with the rest of the setup. I’ve always wondered if mounting stuff off the handlebar and seatpost is slightly less stable due to its higher position. I guess the reduced weight counteracts this sufficiently.
Cheers Nick, I’ll keep you posted on how it works out in the long run
Man I cannot wait to leave on Sunday! I have my whole set up done and I am excited to get going! Hope all is well mate! Love the posts!
Your site’s looking fantastic, good luck with the grand depart!
Pingback: Arrested by Peruvian Villagers (We’ve All Been There) | THE RIDE SOUTH·
I love how minimal that is. It doesn’t look like there should be enough space to fit everything you list on your gear page though! How much does it all weigh?
Thanks Dominic, yes it can feel like a tetris puzzle at times. I’m not sure about weight but I think the whole set up (bike, gear but no food/water) is sub 30kg, 28kg if I was a betting man! Also thanks for your route intel, I’ve used it on a couple of occasions.
Cheers
Paul
Hi, nice page, really informative and story telling. Had you ever write on your post about getting sick on the road, does an international Heath insurance really work in remote places in South America? what are the medicines you consider should be take with us, kind of a suggestion for a fist aid kid. Thanks and keep enjoying what the world have for us.
Hey, thanks for visiting. I’ve yet to test out my health insurance (I’m with STA travel) in latin america as so far trips to the doctor and purchase of medicine have been so cheap I haven’t bothered using it. I like the peace of mind it provides though in case of a serious problem. I’m very minimalist when it comes to medicine as you can generally find what you need locally, good pharmacies have been in every small town so far, it’s big business out here. I only pack a general antibiotic doxycline, a load of rehydration salts for the inevitable diarrhea and a few steri strips and bandages in case of a crash.
All the best
Paul
Looking leaner and meaner! Love that Revelate Digicamo pocket; my wife has the same one and I’ve been smuggling off on rides recently… cheers.
Hey paul, where are you hiding your laptop? Camera? I am wanting to get lighter but don’t want to carry a backpack mate. I want to lose the rear rack if I can but thats where I have my backpack strapped on. Any suggestions? I am now in Bellingham WA but am thinking about when I get into Oregon then heading over to Utah then down into Arizona and back over to California. Seeing as I haven’t seen most of my own country lol living in Alaska has ups and downs! Kinda wishing I was in south america on the dirt routes you’re taking they look absolutely epic!!
Hey Patrick, you’re flying, nice work! The laptop is stored in the centre of the rear dry bag, it just fits and is surrounded by tent fabric and clothes on both sides for protection. Works great. The camera and lens are in the front ‘pocket’ for easy access, a surprisingly roomy accessory. Ordinarily I don’t use a backpack. Good luck anyway, you’ve got some cracking riding ahead of you, especially when you hit the Andes, it’ll blow your mind! Cheers
Where do you carry your 10l water bag?
Hey Nick, I haven’t had to use it in anger yet (only for water collection at campsites), but when I do, e.g. Bolivia, I’ hoping I’ll be able to strap it on top of the rear bag.. I’ll let you know how it works out in practice! Cheers
Thanks, I have only actually ridden about 1300 km of the route. Problems with Achilles and knees from starting with too much mileage too quickly. I got a ride from a little past beaver creek to Skagway from a nice guy who just offered me a ride. then ferries to prince rupert and then a train ride to prince george because I didn’t want to face 80 km/h headwinds and driving rain lol. All in all it is going well! I will probably keep my rear rack until I at least hit mexico. I am looking to get some longer dry bags for the front anything racks. I am using small event compression bags now but they are getting lots of holes and I want something a bit more durable! And I am thinking of putting my camera in the gas tank bag I am looking to buy.
Reblogged this on diário / viagem de bike de Paranagua-Pr ao Rio de janeiro and commented:
Ideias para organizar sua bike / distribuir o peso
Hi Paul, How’s the framebag holding together? Was considering getting one. Cheers, N
How have you strapped on the pocket and handlebar bag? It looks like it’s being held on by just the pocket straps? No need for the revelate harness?
Hey nick, as pictured the dry bag is strapped directly to the bars with two cam lock straps, then the pocket is strapped to the bars separately, i.e over the top, via its own straps. It works fine like this but I’m now using a prototype harness, I’ll send you some pics…